Circular saw not cutting straight? Diagnose the drift
Quick answer
A circular saw usually stops cutting straight because the work or guide moves, the kerf closes and pinches the blade, the blade is wrong, damaged, or incorrectly seated, the shoe or locks move, or the operator steers or forces the saw. First identify whether the symptom is freehand drift, drift against a guide, a straight but out-of-square cut, a changing kerf, or binding. Disconnect power before inspecting, correct one cause at a time, and confirm the result on stable scrap.
Common questions
- Why does my circular saw wander even with a guide?
- The guide may be bowed, incorrectly offset, poorly clamped, or moving under side pressure. The shoe can also lift away from the guide, a loose bevel or depth lock can move, or the blade and shoe may not be aligned as the exact saw manual specifies. Disconnect power before checking the setup.
- Why is my circular saw cut straight but not square?
- A straight top line with an angled cut face points first to the bevel setting, a loose bevel lock, debris under the shoe, or a damaged or misaligned shoe. Verify the cut face with a reliable square, then follow the exact model manual for a power-disconnected inspection or authorized service.
- Can I force a circular saw back onto the line?
- No. Twisting or forcing the saw in the kerf can bind the blade and increase kickback risk. Release the trigger, hold the saw motionless until the blade stops, remove power before inspection, and correct the layout, support, guide, blade, or tool condition before another test.
Source note: Safety and model-specific examples were checked on October 2, 2026, against Ryobi's circular-saw troubleshooting flow, the SKIL 5280-01 manual, the DeWalt DCS570 manual, Diablo blade specifications, and OSHA handheld-saw and kickback guidance. The manuals for the exact saw and blade control compatibility, setup, adjustment, and use.
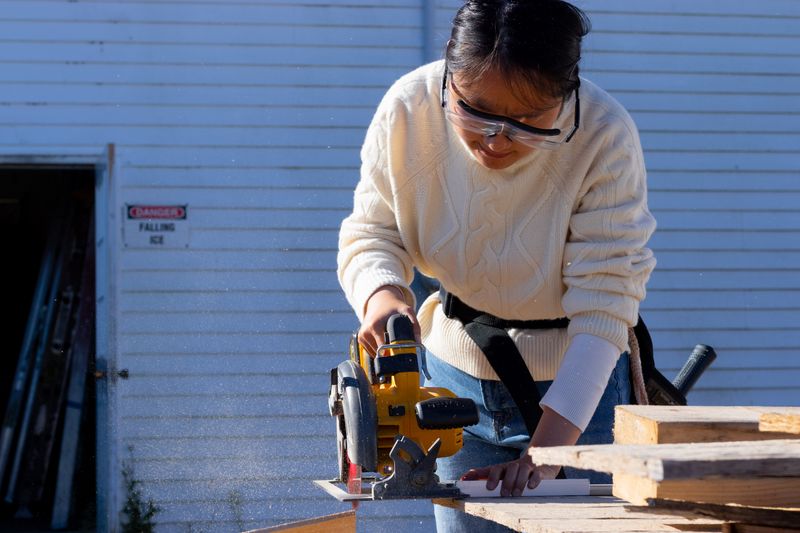
If your circular saw is not cutting straight, do not start by adjusting the shoe or buying a new blade. First name the symptom: freehand drift, drift while following a guide, a straight cut that is not square through the thickness, a kerf that changes width, or binding. Each pattern sends you to a different first check.
The common causes are movement in the work or guide, kerf closure, a blade problem, a loose or damaged saw component, or sideways feed pressure. Treat drift plus binding, vibration, guard trouble, or visible damage as a safety problem—not a finish-quality problem.
Stop before diagnosing a moving saw
Release the trigger if the saw binds, stalls, twists, changes sound, or needs abnormal force. Hold the saw motionless until the blade stops. Do not pull a spinning blade backward through the kerf or try to steer it back onto the line.
Before inspection, disconnect the cord or remove the battery. Keep the upper and lower guards in place and working; never tie, wedge, or modify a guard. Also stop if the blade, arbor, shoe, handle, cord, battery interface, bevel lock, or depth lock is damaged or will not secure as the manual requires.
For every cut and test:
- Secure the stock to a stable work surface; never hold it in your hand or across your leg.
- Support long boards and large panels so the stock cannot sag, shift, or close the kerf on the blade.
- Keep hands and your body out of the cutting line, and use the handles specified by the manufacturer.
- Wear the eye, hearing, respiratory, and other protection required for the tool, material, and workplace.
- Use the correct blade and keep all safeguards functional.
OSHA requires portable circular saws to have an upper guard and a retractable lower guard. Its woodworking guidance also identifies twisting stock, blade binding, dull or damaged blades, poor support, and missing safeguards as kickback factors.
Match the symptom to the first check
Inspect the stopped offcut before changing anything. Mark the top face, guide side, feed direction, start, and finish.
| Symptom | Likely cause family | First safe check |
|---|---|---|
| Freehand cut drifts from the layout line | Steering, changing stance or grip, obscured layout, unsuitable stock, or blade trouble | Confirm the stock is stable and the blade is correct; use an approved guide for a straight finished cut |
| Cut drifts while the shoe follows a guide | Guide movement or bow, wrong offset, shoe lifting, sideways pressure, or shoe-to-blade relationship | Check guide straightness, offset, clamp security, and uninterrupted shoe contact |
| Top line is straight but cut face is not square | Bevel setting, loose bevel lock, debris, bent shoe, or model-specific zero adjustment | Verify the face with a reliable square, then inspect the de-energized saw as its manual directs |
| Kerf widens, narrows, or curves | Stock movement, guide movement, steering, blade deflection, or changing material resistance | Compare the two kerf edges and note exactly where the change begins |
| Saw binds, slows, or stalls | Kerf closure, poor support, wrong or damaged blade, excessive depth, foreign material, or forcing | Stop; do not repeat the cut until support, stock, blade, depth, and feed plan pass inspection |
The layout line itself can be wrong. Check it from the same reference edge with dependable marking and measuring tools before blaming the saw.
Freehand drift is different from guide drift
A circular saw can follow a rough freehand line, but a repeatable straight finished cut needs a suitable edge guide, rail, or securely clamped straightedge permitted by the saw manual. Do not try to correct freehand drift by pushing harder or twisting the saw in the kerf.
If a guided cut wanders, leave the guide clamped and inspect the evidence after power is disconnected:
- Measure the guide-to-cut-line offset at both ends. Use the same manufacturer-approved reference edge on the shoe.
- Check the guide for bow and confirm every clamp stayed secure and clear of the saw path.
- Look for dust, a clamp head, a raised edge, or damaged material that could lift the shoe.
- Check whether rubbing marks show that the shoe stayed against the guide for the whole cut.
- Confirm the guide or rip-fence model is approved for the exact saw.
More clamping force is not automatically the answer; it can bow a weak guide or mark the work. Choose a stable guide and appropriate woodworking clamps, then place them where they cannot enter the blade or shoe path.
Check support before adjusting the tool
Poor support can imitate a bad saw. A panel that sags can rotate the saw or close the kerf. A long offcut can drop, lever the stock, or change pressure near the end. Solid wood can also release internal stress and pinch the blade even when the setup began flat.
With power disconnected, reconstruct the cut:
- Was the main workpiece stable from start to finish?
- Were both sides of a large panel supported without trapping the offcut?
- Did a clamp, bench edge, or support block interfere with the shoe?
- Did the kerf begin to close behind the blade?
- Did the drift begin at a knot, fastener, damp area, or other material change?
Do not continue through suspected metal or a closing kerf. Set questionable stock aside and redesign the support so the saw can remain flat and the kerf can stay open.
Inspect the blade in a safe order
Record the saw model and type number plus the blade model before removing anything. The exact manuals—not diameter alone—control blade diameter, arbor, kerf or plate limits, rotation direction, speed rating, material, and application.
With the cord disconnected or battery removed, follow those manuals to check:
- Correct blade specification for the saw, material, and rip or crosscut operation
- Rotation arrows and tooth direction
- Missing or damaged teeth, cracks, warping, heavy pitch, or unusual rub marks
- Correct seating against the specified flange or washer
- Correct blade bolt, washers, tightening direction, and manufacturer procedure
Do not straighten, repair, or keep testing a cracked, warped, damaged, or incorrectly fitting blade. Diablo’s D0760A, for example, is a 7-1/4-inch, 5/8-inch-arbor wood blade rated for particular materials and a maximum 8,000 rpm; those published specifications are not interchangeable with another blade.
Check squareness, shoe alignment, and locks
A straight top edge with an angled face is primarily a squareness clue. Clean only as the manual permits, set the bevel to zero, and secure the bevel and depth locks. Then verify the cut face on a stopped test piece with a reliable square.
If it is still out of square, use the exact model’s inspection procedure. Ryobi’s support flow routes users to blade seating, base-plate alignment, and secure bevel and depth locks. The SKIL 5280-01 and DeWalt DCS570 manuals provide model-specific blade, depth, bevel, support, and kickback instructions; their fasteners and adjustment sequences should not be generalized to another saw.
Do not invent a shoe-alignment procedure or bend a shoe back into shape. If the shoe rocks, the locks move under normal pressure, the arbor has play, the blade contacts a guard, or the manual check fails, label the saw out of service and use authorized service.
Run one controlled scrap test
Test only after the guard, handles, blade, locks, shoe, guide, support, stock, and work area pass inspection. Use straight, stable scrap of the same material and thickness as the failed cut. Make one documented change at a time.
| Scrap-test record | Entry |
|---|---|
| Saw make, model, type, and manual revision | ___ |
| Blade model, diameter, arbor, application, and speed rating | ___ |
| Stock material, thickness, condition, and grain direction | ___ |
| Original symptom and where it began | ___ |
| Support and kerf-clearance plan | ___ |
| Guide type, offset, and clamp locations | ___ |
| Guard, shoe, bevel lock, and depth lock | Pass / fail |
| One change made | ___ |
| Test result at top edge and cut face | ___ |
| Decision | Return to service / service / replace |
Let the saw reach the condition specified in its manual before entering the material, keep the shoe flat, and feed without sideways force. If it binds, vibrates, strains, burns, or drifts again, stop the test and escalate rather than making repeated cuts.
Sources and scope
This diagnostic was checked on October 2, 2026, against these primary sources:
- Ryobi: circular saw not cutting straight
- SKIL 5280-01 product page and manual
- DeWalt DCS570 product page and current manuals
- Diablo D0760A blade specifications
- OSHA handheld-saw safeguards
- OSHA woodworking kickback controls
The OSHA pages describe workplace controls; the manufacturer manuals govern the exact consumer or professional tool. Always check the nameplate, type number, blade model, and current manual instead of applying one model’s procedure to another.
Your next step
Keep the marked test piece and completed worksheet with the saw. If the setup passes and a straightedge-guided circular saw still cannot meet the required tolerance, compare the workflow in track saw vs. circular saw rather than forcing the tool. If the saw or blade fails inspection, use the manufacturer’s service channel before deciding whether a replacement from the circular saw buying guide is justified.
Do not return the saw to service until it makes a controlled scrap cut without drift, binding, abnormal force, guard trouble, or movement in the blade, shoe, guide, locks, or workpiece.

The Carpenter's Guide Editorial Team
Independent trade-focused editorial team