How to Build a Pergola: Complete Step-by-Step Guide
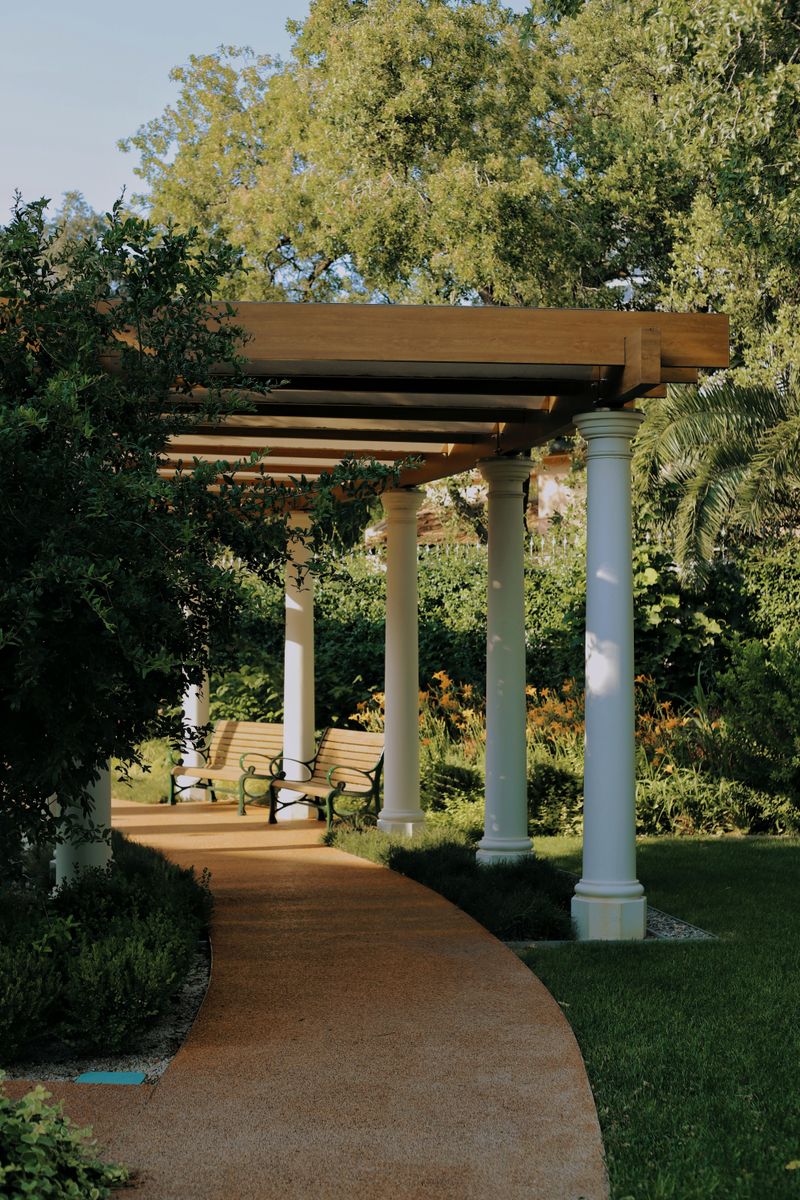
A pergola is one of the most satisfying outdoor structures you can build. It adds architectural presence to a backyard, defines an outdoor living space, and gives climbing plants a place to grow. It’s also a genuinely buildable weekend project for someone with basic carpentry skills and access to a miter saw, drill, and post hole digger.
This guide covers building a freestanding 12x14-foot pergola — a common size that fits over a patio table or seating area. Adapt the dimensions to your site, but the sequence and methods apply across most residential pergola builds.
Before You Start: Permits and Planning
Check with your local building department before you pour a single concrete footing. Most jurisdictions require a permit for any permanent structure attached to footings, including freestanding pergolas. Requirements vary, but commonly include:
- A site plan showing the pergola location and setbacks from property lines
- Basic structural drawings (post size, beam size, connection hardware)
- Footing depth requirements based on local frost depth
Setback requirements matter. Most municipalities require structures to be set back at least 3–5 feet from property lines; more in some areas. Verify before you commit to a location.
Permit fees for a pergola typically run $50–$200. The process takes 1–4 weeks in most areas. Build without one and you risk being ordered to tear it down or having issues when you sell.
Materials List
For a 12x14-foot freestanding pergola with 4 posts, you’ll need:
Posts (4):
- 6x6 pressure-treated lumber, 10-foot length (or longer depending on your footing depth plus desired height)
Beams (2, running the 14-foot direction):
- Double 2x10 or single 4x10, 16 feet long (to allow overhang on each end)
Rafters (7–9, running the 12-foot direction):
- 2x8 lumber, 14 feet long (with overhang), spaced 16–24 inches apart
Purlins or shade boards (optional, decorative):
- 2x2 or 2x4 lumber, running perpendicular to rafters
Hardware:
- Post base anchors (4) — use Simpson Strong-Tie or equivalent rated for the post size
- Beam-to-post hardware (8 pieces, both sides of each beam-post connection)
- Structural screws or through-bolts
- Joist hanger screws or structural screws for rafter-to-beam connections
Concrete:
- 80-lb bags of fast-setting concrete mix — about 3–4 bags per post hole
Lumber totals for a 12x14 pergola (approximate):
| Material | Quantity |
|---|---|
| 6x6 PT posts (10’) | 4 |
| 2x10 (16’) or 4x10 (16’) | 4 (for doubled beams) or 2 |
| 2x8 (14’) rafters | 8 |
| 2x4 (14’) purlins (optional) | 12–16 |
| Post base hardware | 4 sets |
| Beam hardware | 8 |
Tools Required
- Post hole digger (hand auger or rented power auger)
- Level (48-inch minimum; laser level is ideal for setting post heights)
- Circular saw or miter saw
- Drill/driver
- Impact driver
- Speed square
- Tape measure
- String line and stakes
- Safety glasses and hearing protection
- Ladder (6-foot minimum)
Renting a power post hole auger for half a day ($50–$100) will save hours versus digging by hand in most soils.
Step 1: Lay Out the Post Locations
Accurate layout saves every problem that follows. Use the 3-4-5 method to establish square corners.
- Drive stakes at the approximate corners of your pergola and run string lines to establish the perimeter.
- Measure 3 feet along one string and 4 feet along the adjacent string from the corner. The diagonal should measure exactly 5 feet if the corner is square. Adjust until it is.
- Mark the exact center of each post hole with a stake.
For a 12x14-foot pergola, the posts sit at the corners — 12 feet apart in one direction, 14 feet apart in the other (measuring center-to-center).
Step 2: Dig and Set Footings
Footing depth: Posts must be below the frost line in your area. In the northern US, this often means 42–48 inches. Check your local code — the inspector will verify depth.
- Dig each hole to the required depth with a diameter of about 12 inches. A power auger will drill a clean-sided hole; a hand digger takes about 45 minutes per hole in moderate soil.
- Add 6 inches of gravel at the bottom of each hole for drainage.
- Set a post base anchor in the concrete before it sets — do not put posts directly in the ground (they will rot within years). Post bases lift the post off the concrete, keeping end grain away from moisture.
- Mix fast-setting concrete per package directions and pour into each hole. Most fast-set formulas allow the anchor to be positioned immediately and reach working strength in 4 hours.
- Use a level and string line to ensure all four anchors are perfectly positioned before the concrete sets. This is the most critical step — errors here cascade through the entire build.
Step 3: Set the Posts
Once footings are cured (next day minimum):
- Cut posts to length. For an 8-foot finished post height, account for the post base height (typically 3 inches) plus the footing surface height.
- Secure posts to base anchors using the hardware manufacturer’s specified fasteners.
- Plumb each post with a level on two adjacent faces. Temporarily brace each post with 2x4 diagonal braces secured to stakes in the ground. Leave braces in place until beams are installed.
Step 4: Install the Beams
Beams span between the two posts on each 14-foot side.
Building a double 2x10 beam:
- Cut two 16-foot 2x10 boards (this gives 1-foot overhang at each end).
- Bolt or screw them together with structural screws (3-inch minimum) every 12–16 inches, staggered top and bottom.
Installing beams:
- Mark the top of each post for beam height. All four posts must be cut to the same height — use a laser level or water level to mark, then trim post tops with a circular saw.
- Lift the beam onto the posts. This requires at least two people and ideally three.
- Secure the beam using post-to-beam hardware on both sides of each post. Don’t rely on toenailing alone — use rated structural connectors.
Step 5: Install the Rafters
Rafters run perpendicular to the beams, typically spaced 16–24 inches on-center. Tighter spacing provides more shade; wider spacing is lighter and uses less material.
- Mark rafter spacing on both beams simultaneously — use a story pole or tape for consistency.
- Cut rafter tails to the decorative profile you want (square, angled, curved). Mark a template from one rafter and use it to cut all others identically.
- Install end rafters first (flush with beam ends), then fill in the interior rafters.
- Secure each rafter with structural screws driven at an angle (toenail) or with rafter hardware on top of the beam. Minimum two fasteners per connection per side.
Step 6: Add Purlins (Optional)
Purlins are the thinner boards that run across the top of the rafters, creating the classic layered look and adding shade density.
- 2x2 or 2x4 material works well, spaced 6–12 inches apart
- Cut to the same overhang length as the rafters
- Secure with two screws per rafter crossing from above
This step is optional — a pergola without purlins is structurally complete. Purlins add visual appeal and partial shade.
Step 7: Finishing and Sealing
For pressure-treated lumber: New PT lumber needs time to dry before staining or painting — typically 3–6 months. Staining too early causes the finish to peel. You can apply a water repellent sealer immediately; full stain application should wait.
For cedar or redwood: These can be finished immediately. Apply a penetrating oil finish or exterior stain for UV protection and to slow the natural weathering to gray.
Hardware: Hit all exposed screws and hardware with an exterior-rated spray paint or metal primer to slow oxidation.
Debris: Sweep sawdust off decking and landscaping before it stains.
Material Costs
For a 12x14-foot freestanding pergola in 2026 using pressure-treated lumber:
| Item | Estimated Cost |
|---|---|
| PT 6x6 posts (4) | $120–$200 |
| 2x10 beam lumber | $150–$250 |
| 2x8 rafters (8) | $160–$280 |
| 2x4 purlins (optional, 14) | $80–$140 |
| Post base hardware | $80–$120 |
| Beam/rafter connectors | $60–$100 |
| Concrete (16 bags) | $80–$120 |
| Fasteners/screws | $40–$80 |
| Total materials | $770–$1,290 |
Cedar or redwood adds approximately 40–80% to lumber costs. Pre-designed pergola kits (hardware and pre-cut lumber) run $1,500–$4,500 and simplify the build but limit customization.
Labor, if you hire the project out: expect $2,000–$5,000 for a pergola of this size, depending on your region and the complexity of the design.
Common Mistakes to Avoid
Skipping the permit. Even in areas where enforcement is relaxed, an unpermitted structure creates problems at sale. Pull the permit.
Posts set directly in concrete. Concrete wicks moisture; end-grain wood in contact with wet concrete rots within a decade even with PT lumber. Always use post base hardware.
Undersized hardware. The load on a 6x6 post with double beam and multiple rafters is significant. Use hardware rated for the application — Simpson Strong-Tie publishes load tables online. Don’t substitute lighter hardware to save $10.
Rushing footing cure time. Fast-set concrete reaches working strength in 4 hours but continues curing for 28 days. Loading it immediately won’t cause a failure, but putting heavy bending loads on it (racking the post during beam installation) before 24 hours can weaken the footing.
Poor layout. Posts that aren’t square to each other make every subsequent step harder. Spend an extra 30 minutes getting layout perfect; it pays dividends through the entire build.
Adding Shade and Plants
Once the structure is up:
- Shade cloth: UV-resistant knitted fabric attaches to purlins and provides 50–90% shade. Shade cloth is the fastest way to make a pergola functional in summer.
- Climbing plants: Wisteria, climbing roses, clematis, and trumpet vine are common choices. Install plant staples or wire mesh to give vines something to grab.
- Retractable canopy: Canopy kits designed for pergola beams ($150–$600) add all-weather functionality.
- String lights: A classic addition; run cable through screw eyes in the purlins and drape Edison bulb strands for evening ambience.
The Finished Result
A well-built 12x14-foot pergola transforms an open patio into a defined outdoor room. The build takes a committed weekend for someone with carpentry experience — figure one day for footings and posts, one day for beams and rafters, and a few additional hours for purlins and finishing. The materials cost is modest, the result is durable, and it’s the kind of project that adds genuine value to a home.

The Carpenter's Guide Editorial Team
Independent trade-focused editorial team