Kitchen Cabinet Refacing: Complete DIY Guide
Quick answer
Cabinet refacing is a good fit when the existing cabinet boxes are square, dry, securely fastened, and the layout still works. Replace instead when water damage, failing boxes, layout changes, or major electrical and plumbing moves are part of the renovation.
Common questions
- When is cabinet refacing worth it?
- Refacing is worth considering when the cabinet boxes are structurally sound, the current layout works, and the visible problem is doors, drawer fronts, face frames, or finish rather than the boxes themselves.
- What costs should you compare before refacing cabinets?
- Compare DIY refacing materials, professional refacing, and full cabinet replacement. Refacing is strongest when it solves the visual problem without forcing new boxes, countertops, or major trade work.
- What prep matters most before applying cabinet veneer?
- The face frames need to be clean, degreased, scuff-sanded, and dust-free. Veneer laid over grease, peeling finish, loose laminate, or uneven surfaces is much more likely to fail.
Source note: Reviewed July 2026 against the article guidance and common cabinet refacing practice; cabinet condition, material specs, hardware instructions, local code, and site measurements control final decisions.
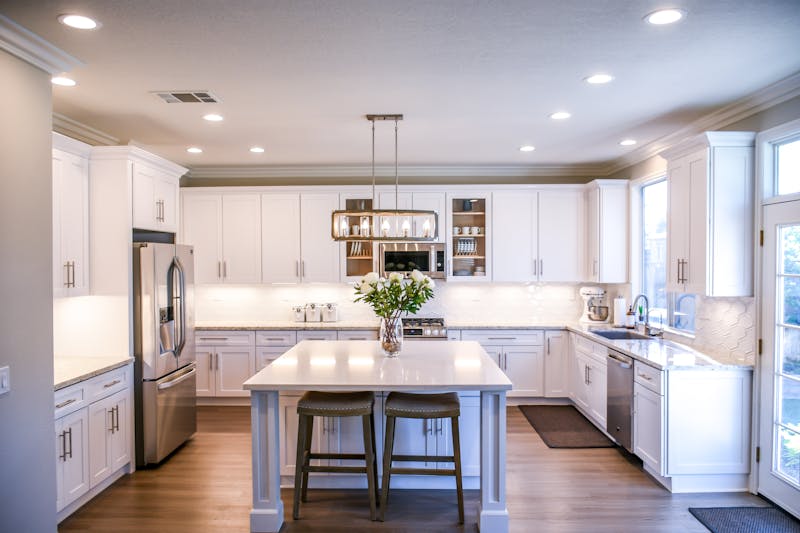
Cabinet refacing is the kitchen renovation strategy that most homeowners overlook. A full kitchen cabinet replacement — new boxes, new doors, new hardware, professional labor — typically costs $8,000 to $25,000. A professional refacing job runs $3,000 to $9,000. A DIY refacing project using quality materials can come in under $1,500, and the result is indistinguishable from a full replacement to anyone who did not see your kitchen before.
The idea is straightforward: your cabinet boxes (the plywood or particleboard carcasses screwed to the wall) are almost certainly structurally sound. What makes a kitchen look dated is the surface — the doors, drawer fronts, exposed side panels, and the finish on the face frames. Refacing replaces all of those visible surfaces while leaving the underlying boxes in place.
This guide covers the full DIY process: evaluating whether your cabinets are good candidates, choosing materials, applying veneer to face frames and exposed panels, installing new doors and drawer fronts, and updating hardware for a complete transformation.
Quick Answer: Reface When the Boxes Are Sound
Cabinet refacing is worth considering when the cabinet boxes are square, dry, securely fastened, and the existing layout still works. Replace instead when water damage, poor layout, failing boxes, or major electrical and plumbing changes are part of the renovation.
For budgeting, compare three numbers: DIY refacing materials, professional refacing, and full replacement. Refacing is strongest when it solves the visual problem without forcing new cabinet boxes, countertops, or major trade work.
Is Your Kitchen a Good Candidate for Refacing?
Refacing only makes sense when the cabinet boxes themselves are in good structural condition. Walk through this checklist before committing to the project.
Good candidates:
- Cabinet boxes are plumb, level, and securely fastened to the wall
- No significant water damage, rot, or delamination in the box panels
- The interior dimensions and layout work for your needs (you are happy with the number of cabinets and their positions)
- Hinges and slides are functioning or can be upgraded easily
Poor candidates:
- Boxes with severe water damage along the base (common under sinks)
- Cabinets that are badly out of square and cannot be shimmed
- Kitchens where the layout needs to change — adding an island, moving upper cabinets, or relocating the sink
- Very old cabinets with face frames made from flimsy materials that will not hold new veneer
If one or two base cabinets have water damage, you may be able to replace just those boxes (a partial replacement) while refacing the rest. This hybrid approach is still far cheaper than a full gut renovation.
Planning and Material Selection
Measuring for Doors and Drawer Fronts
Before ordering anything, measure every door opening and every drawer front. Face-frame cabinets can use inset, partial-overlay, or full-overlay doors, and the existing coverage is not a universal dimension. Use the cabinet hinge and overlay guide to document the door position, hinge cup, mounting plate, and clearances before specifying replacements.
Measure each opening individually. Kitchens are rarely perfectly consistent, and a 1/4” discrepancy in opening size will be visible if all your doors are cut to the same dimension.
Drawer fronts are usually sized to overlap the opening by 1/2” on all sides as well. On multi-drawer stacks, leave a consistent reveal (gap) between adjacent drawer fronts — 1/8” is standard.
Choosing a Door Style
This is the decision that defines the look of your finished kitchen. Common options:
Shaker doors — flat-center panel with a simple square-profile frame. Clean, versatile, and the most popular choice for both traditional and contemporary kitchens. Works equally well painted or stained.
Slab doors — a single flat panel with no frame. The most modern and minimalist look. Almost always painted rather than stained.
Raised panel doors — a shaped center panel that sits above the frame plane. The classic traditional look. More expensive to order and harder to paint without brush marks in the profiles.
Glass-insert doors — frame-and-panel construction with a glass center instead of wood. Ideal for upper cabinets where you want to display dishes or break up a wall of solid panels.
For a DIY reface with a painted finish, shaker doors from a cabinet door supplier are the most practical and cost-effective option. Many online suppliers (IKEA, Barker Cabinet, Walzcraft, Cabinetdoors.com) offer unfinished or pre-primed shaker doors at reasonable prices per square foot.
Veneer for Face Frames and Exposed Panels
The face frames (the solid wood strips on the front of each cabinet box) need to be covered with veneer to match the new doors. Two main options:
Peel-and-stick wood veneer — a thin layer of real wood veneer on a pressure-sensitive adhesive backing. Applied like a large sticker. Available in most common species (oak, maple, birch, cherry, walnut). Works best on clean, flat surfaces with no loose laminate or peeling finish.
Paper-backed wood veneer — thicker and more forgiving than the peel-and-stick type. Applied with contact cement or an iron-on adhesive sheet. Produces a more durable bond and is better suited for surfaces with minor imperfections.
For exposed side panels (the visible end of a cabinet run that faces into the room), you have a few additional options:
- Apply veneer the same as the face frames
- Cut a new 1/4” plywood panel (finished on one face) and glue it over the existing side
- Use a 1/4” beadboard panel for a more decorative look
Hardware
New hardware is the finishing touch that completes the reface. Pull or knob style choices:
- Bar pulls — horizontal bar handles, popular on shaker and slab doors. Clean and modern.
- Cup pulls — small semicircular pulls that mount below the drawer front. Traditional and ergonomic.
- Round knobs — classic choice for traditional kitchens. Require only one hole and are easy to install.
- Edge pulls — low-profile pulls that install on the door edge rather than the face. Very minimalist.
For hinges, replace your old hinges with European concealed cup hinges — soft-close versions are well worth the small price premium. They are adjustable in three dimensions, making final door alignment simple even if your face frames are not perfectly consistent.
Recommended products:
- Franklin Brass Bar Pulls (10-pack) — affordable, durable matte black or brushed nickel finish
- Blum CLIP top BLUMOTION Soft-Close Hinges — the industry standard for concealed hinges
- SOSS Invisible Hinges — for a truly frameless look on specialty doors
Tools and Supplies
Essential:
- Tape measure, pencil, and straightedge
- Utility knife and fresh blades
- J-roller or veneer roller (for pressing veneer)
- Orbital sander (80, 120, 180, 220 grit)
- Cordless drill/driver
- 35mm Forstner bit (for European hinge cups)
- Level
- Clamps (6 to 8 bar or pipe clamps)
For veneer application:
- Contact cement (if using paper-backed veneer) or a clothes iron (for iron-on veneer)
- Veneer trimmer or sharp block plane
- Fine-tooth flush-trim router bit
For finishing:
- Primer (shellac-based for painted cabinets, sanding sealer for stained)
- Cabinet paint (water-based alkyd hybrid is the current standard) or stain and topcoat
- Quality brush and/or spray equipment
- Tack cloth
Step-by-Step: Refacing Your Cabinets
Step 1: Remove Everything
Empty all cabinets. Remove every door, drawer front, and drawer. Label each door and drawer with masking tape (W1, W2, B1, B2, etc.) so you can track which opening each belongs to — especially important if your openings vary slightly in size.
Remove old hinges and pulls. Fill hinge screw holes in the face frames with wood filler if you are changing hinge placement (e.g., switching from exposed traditional hinges to concealed cup hinges). Let filler dry completely.
Step 2: Clean and Prep the Face Frames
This step determines how well your veneer sticks. The face frame surface must be:
- Clean — remove grease, cooking residue, and wax. Use a degreaser (TSP substitute or a citrus cleaner) and let dry fully.
- Scuff-sanded — lightly scuff the existing face frame surface with 100-grit sandpaper to give the veneer adhesive something to grip. Sand with the grain.
- Dust-free — vacuum and wipe with a tack cloth. Any dust under the veneer will create bumps that show through.
If your face frames have any loose laminate or peeling paint, scrape it all off and sand smooth. Veneer laid over a loose substrate will peel.
Step 3: Apply Veneer to Face Frames
Work one face frame section at a time — typically each cabinet unit has one left stile, one right stile, a top rail, and a bottom rail (and possibly a center rail or stile between drawers).
For peel-and-stick veneer:
- Cut a strip slightly oversized (1/4” extra on each edge) with a utility knife and straightedge.
- Peel back 3 to 4 inches of the backing and align the veneer at one end of the stile or rail.
- Press down the first few inches firmly, then slowly peel the backing while pressing the veneer flat with a J-roller as you go. Work in 6-inch sections.
- Once fully adhered, roll the entire surface firmly with the J-roller to eliminate air pockets and ensure full adhesion.
- Trim flush with a veneer trimmer or a sharp block plane. A flush-trim router bit gives the cleanest result on flat surfaces.
For iron-on paper-backed veneer:
- Cut strips oversized.
- Apply contact cement to both the veneer back and the face frame surface, following the manufacturer’s pot time instructions (typically 15 to 30 minutes until tacky).
- Carefully position the veneer — contact cement bonds on contact and cannot be repositioned.
- Press firmly with a J-roller, then run a household clothes iron over the surface on medium heat to re-activate the adhesive and improve the bond.
- Trim flush.
Order of application: Apply veneer to all vertical stiles first, then horizontal rails. This way, the rail veneer overlaps and hides the end grain of the stile veneer at the corners, creating a cleaner joint. The reveals at corners should be tight and clean.
Step 4: Veneer Exposed Side Panels
For end panels that are visible from the room, apply veneer using the same process. For larger panels (a full 30” x 42” cabinet end), it is usually easier to use a single sheet of paper-backed veneer applied with contact cement, rather than multiple strips of peel-and-stick.
Alternatively, cut a piece of 1/4” plywood (cabinet-grade, finished one side) to the exact dimensions of the end panel and glue it in place with construction adhesive. Clamp or tack it with a brad nailer. This approach adds a very slight depth to the side profile but produces a perfectly flat, smooth surface that takes paint or stain beautifully.
Step 5: Prime and Paint or Stain
For painted cabinets:
- Apply a shellac-based primer (Zinsser BIN or equivalent) with a brush or spray. Shellac primer bonds to nearly any surface and prevents tannin bleed from the veneer showing through the topcoat. One coat is usually sufficient.
- Sand lightly with 220-grit when dry. Wipe clean.
- Apply water-based alkyd hybrid cabinet paint (Benjamin Moore Advance, Sherwin-Williams Emerald Urethane, or similar). These products level beautifully and cure to a hard, scrubbable finish. Apply two to three thin coats, sanding lightly between coats with 320-grit.
For the best finish on new doors, paint them flat on sawhorses before installation. Spray application gives a factory-smooth result; brush or roller application with a foam roller is nearly as good with the alkyd hybrid paints.
For stained and varnished cabinets:
- Apply a sanding sealer and sand back to 220 grit.
- Apply your chosen stain and wipe off the excess according to product directions.
- Topcoat with two to three coats of water-based polyurethane (satin or semi-gloss), sanding with 320-grit between coats.
Step 6: Drill Hinge Cups and Install Hardware
For European cup hinges, you need to drill a 35mm flat-bottom hole in the back face of each door at a precise location — typically 3/4” to 1” from the door edge and at the appropriate height from the top or bottom of the door.
Use a 35mm Forstner bit in a drill press for the most accurate results. A handheld drill with a drilling jig (Blum makes a dedicated hinge jig) works nearly as well. The cup should sit flush with the door face — do not drill through.
Once cups are installed, mount the hinge plates (the wall-side component) to the face frame, following your hinge manufacturer’s spacing recommendations. Clip the doors in place. Adjust in three axes using the hinge adjustment screws until all doors are even and gaps are consistent. This adjustment is easy and precise — it is one of the biggest advantages of European hinges.
For pulls and knobs, mark hole locations on each door and drawer front with a template (a simple piece of pegboard or a purchased hardware template jig). Drill from the front face of the door with a sharp 3/16” or 7/32” bit to avoid tear-out. Insert bolts from the back and tighten.
Step 7: Install Doors and Drawer Fronts
With hinges adjusted and pulls installed, hang all doors. Step back and check alignment: door tops should be level, gaps between adjacent doors should be consistent (typically 1/8”), and all doors should sit at the same plane.
For drawer fronts, attach them to the drawer box with two screws from inside the box. Leave the screws slightly loose, position the drawer front on the cabinet, then tighten. Most installers use small double-sided tape squares on the drawer box face to temporarily hold the drawer front in position while tightening the screws.
Cost Breakdown: DIY Cabinet Refacing
Here is a realistic cost estimate for a medium-sized kitchen (25 to 30 door and drawer-front openings):
| Item | Estimated Cost |
|---|---|
| New doors (25–30 shaker doors, unfinished) | $400–$800 |
| New drawer fronts (6–10) | $80–$150 |
| Wood veneer (face frames + exposed panels) | $60–$120 |
| European soft-close hinges (set of 30–40) | $60–$100 |
| Hardware — pulls and knobs | $80–$200 |
| Primer and paint | $60–$100 |
| Misc. supplies (sandpaper, J-roller, adhesive) | $40–$80 |
| Total | $780–$1,550 |
Compare that to a professional refacing quote (typically $4,000 to $9,000) or a full cabinet replacement ($10,000+). The DIY savings are substantial.
Common Mistakes to Avoid
Not cleaning and degreasing thoroughly. Kitchen surfaces accumulate years of grease. Veneer and primer over contaminated surfaces will peel. TSP substitute and hot water, followed by a complete dry time, is non-negotiable.
Measuring door sizes incorrectly. Doors ordered wrong cannot be returned. Measure every opening twice, note the exact overlay required, and double-check your manufacturer’s sizing conventions before ordering.
Applying veneer over uneven surfaces. Any bump or void under the veneer becomes visible, especially in raking light. Take the time to fill, sand, and flatten the face frames before veneering.
Skipping shellac primer. Standard latex primer over raw wood veneer will raise the grain and may let tannins bleed through — especially with walnut, cherry, or oak veneer. Shellac primer solves both problems.
Installing doors before the paint has cured. Alkyd hybrid paints feel dry to the touch within hours but take 2 to 4 weeks to fully cure. Hang doors gently and avoid slamming them for the first few weeks to prevent finish impressions on cabinet edges.
Frequently Asked Questions
How long does a DIY cabinet reface take?
For a full kitchen, budget two to three weekends of active work, plus drying and curing time between coats. Most people complete the project over two to four weeks total.
Can I reface cabinets over laminate (Thermofoil or melamine)?
Yes, but with extra prep. Lightly scuff the laminate with 100-grit sandpaper, clean with denatured alcohol, and use a bonding primer before veneering. Peel-and-stick veneer is less reliable over smooth laminate; paper-backed veneer with contact cement works better.
What if my face frames are different widths?
Standard face frame members are 1-1/2” wide, but older kitchens may vary. This is fine for refacing — just cut your veneer strips to match the actual width of each member.
Should I reface or replace under-sink cabinets with water damage?
Replace them. Water-damaged particleboard is not structurally sound, and even a perfect reface job will eventually fail as the compromised substrate breaks down. Replacing one or two base cabinets while refacing the rest is a straightforward compromise.
Can I change the cabinet color from stained wood to painted white?
Yes — this is one of the most popular refacing upgrades. Apply shellac-based primer over the veneered face frames and over the new raw-wood doors before painting. The shellac prevents the original stain from bleeding through.
Final Thoughts
Cabinet refacing is one of the best-value renovations in the home. For a fraction of the cost of new cabinets, you can completely transform the look of your kitchen — changing the door style, updating the color, and refreshing all the hardware. The structural work is already done; you are simply updating the face of it.
The project requires patience and attention to detail — especially in the prep and painting stages — but the skills involved are well within reach for anyone comfortable with basic carpentry and finishing. The result is a kitchen that looks brand new, built around cabinet boxes that may well last another 30 years.
Related Cabinet and Material Guides
- How to Build Kitchen Cabinets helps compare refacing with a full cabinet build.
- Wood Types Guide explains hardwood and softwood choices for doors, frames, and trim.
- Plywood vs. Solid Wood covers sheet goods versus solid stock for cabinet parts.
- Wood Glue Guide helps match adhesives to veneer, trim, and repair work.
- How to Install Crown Molding supports the trim details that often finish a cabinet refresh.
Plan cabinet materials, trim, and cut lists together
These related guides connect refacing decisions to cabinet construction, wood choice, plywood, adhesives, trim, and board-foot planning.
- Build kitchen cabinets
Compare refacing with the scope of new cabinet construction.
- Wood types guide
Choose hardwood, softwood, or engineered material for visible cabinet parts.
- Plywood vs. solid wood
Understand where each material fits in cabinet boxes, doors, and trim.
- Wood glue guide
Pick adhesives for veneer, trim, repairs, and cabinet assembly.
- Install crown molding
Plan the finish details that often come with cabinet refacing.
- Board-foot and cut-list worksheet
Print the worksheet to estimate boards, parts, and waste before buying lumber.

The Carpenter's Guide Editorial Team
Independent trade-focused editorial team