Best Brad Nailers for Trim Carpentry in 2026
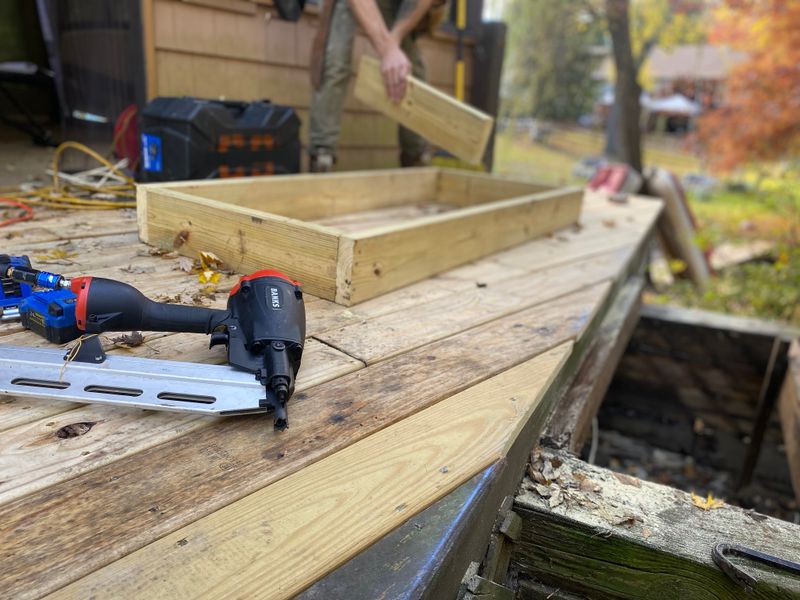
A good brad nailer changes the pace of trim carpentry. Instead of juggling a hammer, nail set, and delicate molding that wants to move, you can hold the work exactly where it belongs and fasten it with one hand. The right 18-gauge brad nailer leaves a tiny hole, reduces splitting in narrow stock, and makes cabinet trim, wainscoting, shoe molding, face frames, and small woodworking projects much cleaner.
The wrong one does the opposite. It leaves proud nails, blows through the side of thin molding, jams constantly, or weighs so much that installing trim overhead becomes miserable. This guide covers the best brad nailers in 2026, how cordless and pneumatic models compare, and which features actually matter for woodworking and finish carpentry.
What a Brad Nailer Is Best For
A brad nailer drives 18-gauge brad nails. Those nails are thinner than the 15-gauge and 16-gauge nails used by finish nailers, so they leave smaller holes and are less likely to split delicate trim.
Use an 18-gauge brad nailer for:
- Shoe molding and quarter round
- Cabinet trim, scribe molding, and light crown
- Wainscoting battens and panel molding
- Picture frames and small boxes
- Light face-frame tacking while glue dries
- Thin hardwood edging and shop jigs
Do not expect an 18-gauge brad nail to replace structural fasteners. For heavy baseboard, door casing, stair parts, exterior trim, or thick crown molding, a 15-gauge or 16-gauge finish nailer gives better holding power. For fine detail work where even an 18-gauge hole is too large, a 23-gauge pin nailer is the cleaner choice.
For most woodworkers and DIY trim carpenters, though, the brad nailer is the first nail gun worth buying.
Cordless vs. Pneumatic Brad Nailers
The biggest decision is power source.
Cordless brad nailers run on a battery, a sealed gas-free drive system, a fuel cell, or a combination of battery and fuel. They are convenient because there is no compressor hose dragging across finished floors and no compressor cycling in the background. The tradeoff is weight and cost. A cordless brad nailer usually costs two to four times as much as a basic pneumatic model, and the tool body is noticeably heavier.
Pneumatic brad nailers run on compressed air. They are lighter, cheaper, and mechanically simpler. If you already own a compressor, a pneumatic 18-gauge nailer is still the best value in the category. The downside is setup: you need a compressor, hose, fittings, and a place to work where the compressor noise is acceptable.
The simple rule: choose cordless if you install trim around the house, work on ladders, move room to room, or already own the battery platform. Choose pneumatic if you work mostly in one shop or want the most performance per dollar.
Key Features to Look For
Fastener range: A good brad nailer should handle nails from 5/8 inch to at least 2 inches. The extra capacity matters for door casing, face frames, thicker trim, and temporary clamping in woodworking projects. Some cordless models stretch to 2-1/8 inches, which is useful but not mandatory.
Tool-free depth adjustment: Depth control is non-negotiable. You need to sink a brad just below the surface without blasting through delicate molding. Look for a wheel or dial that can be adjusted without tools.
No-mar tip: A soft no-mar tip protects painted trim, prefinished hardwood, and cabinet parts. Replacement tips are easy to lose, so check whether the tool stores a spare onboard.
Jam clearing: Every brad nailer jams eventually. Tool-free jam access saves time and keeps you from reaching for an Allen wrench in the middle of an install.
Dry-fire lockout: This feature prevents the nailer from firing when the magazine is nearly empty. It protects the workpiece from driver blade marks and prevents unnecessary tool wear.
Sequential and contact actuation: Sequential mode fires one nail per trigger pull and is the safer, more precise setting for finish work. Contact actuation, often called bump fire, is faster for production work but easier to misuse. For trim and woodworking, sequential mode should be your default.
Weight and balance: Cordless nailers are convenient, but weight matters. A brad nailer that feels fine on a bench may become tiring when you are fastening crown molding overhead. If possible, hold the tool with a battery installed before buying.
Top Brad Nailer Recommendations
Best Overall Cordless: DeWalt DCN680B 20V MAX XR 18-Gauge Brad Nailer (~$250-$320 tool only)
The DeWalt DCN680B is the safest cordless recommendation for most carpenters because it combines strong driving power, good line of sight, and a battery platform many woodworkers already own. It drives 18-gauge brads from 5/8 inch to 2-1/8 inches and uses a brushless motor powered by DeWalt’s 20V MAX battery system.
The most important feature is consistency. The DCN680B sinks nails cleanly in poplar, pine, MDF trim, and most hardwood molding without needing a compressor or gas cartridge. The micro nose gives better visibility than older cordless nailers, which helps when placing nails close to an edge or following a tight reveal line.
It is heavier than a pneumatic nailer, but the lack of hose makes it faster for room-to-room trim work. If you already own DeWalt batteries, this is the 18-gauge brad nailer to buy first.
Search the DeWalt DCN680B brad nailer
Best Pro Cordless: Milwaukee 2746-20 M18 FUEL 18-Gauge Brad Nailer (~$280-$350 tool only)
The Milwaukee 2746-20 M18 FUEL is the premium pick for carpenters who already run Milwaukee M18 tools. It has the power and drive consistency professional trim carpenters expect, with the convenience of a fully cordless setup.
Milwaukee’s cordless nailers have improved significantly over earlier generations. This model feels closer to pneumatic performance than most battery-only nailers: quick firing, clean countersinking, and enough power for hardwood casing and cabinet trim when the depth is dialed in correctly. It also has the kind of jobsite-ready build quality that matters if the tool rides in a van every day.
The price is the main limitation. If you are not already invested in M18 batteries, the DeWalt or Ryobi options usually make more financial sense. If your cordless platform is Milwaukee, though, this is a strong pro-grade brad nailer.
Search the Milwaukee 2746-20 brad nailer
Best Value Cordless: Ryobi P322 ONE+ HP 18-Gauge Brad Nailer (~$180-$220 tool only)
The Ryobi P322 ONE+ HP is the best cordless brad nailer for homeowners and hobby woodworkers who want freedom from a compressor without spending pro-tool money. It handles 18-gauge brads from 5/8 inch to 2-1/8 inches and runs on the huge Ryobi ONE+ 18V battery system.
This is not the nailer I would choose for full-time trim carpentry, but it is excellent for the price. For installing shoe molding, building small shop projects, adding wainscoting, repairing cabinet trim, or tacking parts during glue-up, it does the job with far less setup than a compressor.
The body is bulkier than a pneumatic nailer, and you need to spend a few minutes dialing in air pressure and depth settings on scrap before shooting into finished work. Once adjusted, it is a very capable DIY cordless nailer.
Search the Ryobi P322 brad nailer
Best Lightweight Cordless: Paslode CT200S24 Cordless 18-Gauge Brad Nailer (~$300-$380)
The Paslode CT200S24 takes a different approach from battery-only nailers. It uses a compact lithium-ion battery and a fuel cell, which keeps the tool lighter than many cordless competitors. At about 4.25 pounds, it is one of the easiest cordless brad nailers to use overhead or in tight spaces.
That low weight matters during long trim installs. Door casing, crown buildup, chair rail, and cabinet scribe all involve awkward angles where a heavy tool becomes tiring. The Paslode also has a narrow profile that fits well into corners and between cabinet parts.
The tradeoff is fuel. You need to keep fuel cells on hand, check expiration dates, and maintain the tool more carefully than a battery-only nailer. For occasional DIY use, that may be annoying. For trim carpenters who value a lighter cordless nailer, it can be worth it.
Search the Paslode cordless 18-gauge brad nailer
Best Pneumatic Overall: Metabo HPT NT50AE2M 18-Gauge Brad Nailer (~$60-$90)
The Metabo HPT NT50AE2M is the best value for anyone with a compressor. It is light, inexpensive, and proven. The tool drives 5/8-inch to 2-inch 18-gauge brads, carries a 100-nail magazine, and runs on standard shop air.
This is the nailer to buy if you are setting up a woodworking shop and do not need cordless convenience. A pneumatic nailer this light is easier to control than most cordless models, especially on delicate molding where the tool has to sit perfectly square to the surface.
The low price also makes sense for beginners. You can buy this nailer, a box of assorted brads, and a basic air hose for less than the cost of many cordless tool-only models. If you already own a small compressor for inflating tires or running other nailers, the value is hard to beat.
Search the Metabo HPT NT50AE2M brad nailer
Best Pneumatic for Precision: Bostitch BTFP12233 Smart Point 18-Gauge Brad Nailer (~$80-$120)
The Bostitch BTFP12233 Smart Point is a strong choice for cabinet trim and detail work because the nose is smaller than traditional brad nailers. Better visibility makes a real difference when you are fastening narrow molding or placing nails close to an edge.
It drives 18-gauge brads from 5/8 inch to 2-1/8 inches, has tool-free jam release, and runs oil-free, which reduces the chance of oil staining on unfinished or painted trim. The oil-free design is especially useful for finish work where contamination can cause problems under paint or clear coat.
If your work is mostly base shoe, cabinet trim, picture-frame molding, and detail pieces, the Bostitch is worth the small premium over the cheapest pneumatic nailers.
Search the Bostitch BTFP12233 brad nailer
Best Shop Pneumatic: Makita AF506 2-Inch 18-Gauge Brad Nailer (~$90-$120)
The Makita AF506 is a clean, compact pneumatic nailer for shop furniture, cabinet work, and trim carpentry. It drives 5/8-inch to 2-inch 18-gauge brads, has a 100-nail magazine, and weighs about 2.9 pounds.
Makita’s strength here is refinement. The nose is narrow, the body is comfortable, and the rear exhaust helps keep air from blowing dust and finish debris across the workpiece. For a woodworker using a brad nailer at the bench, those small details matter.
The AF506 is not the cheapest pneumatic option, but it feels better than many bargain nailers and should hold up well in a serious home shop. Pair it with a quiet small compressor and it becomes one of the most useful fastening tools in the workshop.
Search the Makita AF506 brad nailer
Quick Comparison
| Pick | Power source | Best for | Fastener range |
|---|---|---|---|
| DeWalt DCN680B | Battery cordless | Best overall cordless | 5/8” to 2-1/8” |
| Milwaukee 2746-20 | Battery cordless | Pro M18 users | 18-gauge brads |
| Ryobi P322 | Battery cordless | Budget cordless buyers | 5/8” to 2-1/8” |
| Paslode CT200S24 | Battery + fuel | Lightweight cordless trim work | 5/8” to 2” |
| Metabo HPT NT50AE2M | Pneumatic | Best value with compressor | 5/8” to 2” |
| Bostitch BTFP12233 | Pneumatic | Detail and precision placement | 5/8” to 2-1/8” |
| Makita AF506 | Pneumatic | Shop woodworking | 5/8” to 2” |
What Size Brad Nails to Use
Choosing the right brad length matters as much as choosing the nailer.
If the work includes heavier casing or baseboard, compare the workpiece risk and holding tradeoffs in our 15 vs. 16 vs. 18 gauge finish nailer guide before assuming an 18-gauge brad is the right fastener.
Use this as a starting point:
- 5/8” to 3/4” brads: Thin trim, small boxes, delicate moldings, and temporary tacking
- 1” brads: 1/4” to 1/2” trim, applied moldings, and light cabinet details
- 1-1/4” brads: Common choice for 1/2” to 3/4” trim over plywood, MDF, or solid wood
- 1-1/2” brads: Shoe molding, cabinet face-frame trim, panel molding, and light casing
- 2” brads: Thicker trim, hardwood edging, and situations where you need more bite
As a general rule, the nail should penetrate the receiving material by at least 3/4 inch when possible. But avoid nails so long that they curve, blow out the side, or hit wiring, plumbing, or finished surfaces behind the work.
Always test on scrap from the actual project before fastening the final piece. Adjust depth until the brad head sits just below the surface without crushing the wood fibers.
Brad Nailer Setup Tips
Set depth on scrap first. Never start on finished trim. Fire a few nails into matching scrap, adjust the depth wheel, and check whether the nail head is slightly countersunk.
Keep the nose square. Most blowouts happen because the nailer is angled and the brad follows the grain out the side of the molding. Hold the nose flat to the work whenever possible.
Nail into framing when you need strength. Brad nails into drywall have very little holding power. For trim attached to walls, hit studs, plates, or solid backing whenever you can.
Use glue where the joint matters. Brads are excellent clamps, but glue often provides the long-term strength in small woodworking assemblies. For face frames, cabinet trim, and picture frames, treat the brads as clamps while the adhesive cures.
Wear eye protection. Brad nails are thin enough to deflect off knots, hard grain, or hidden fasteners. Safety glasses are not optional.
Which Brad Nailer Should You Buy?
If you want the easiest recommendation, buy the DeWalt DCN680B if you already own DeWalt 20V MAX batteries, the Milwaukee 2746-20 if you are on Milwaukee M18, and the Ryobi P322 if you want cordless convenience at a lower price.
If you already own a compressor, start with the Metabo HPT NT50AE2M or Makita AF506 instead. Both are lighter than cordless models, cost much less, and are excellent for shop woodworking and trim work.
The best brad nailer is not the most powerful nailer. It is the one that places small fasteners cleanly, sinks them consistently, and lets you work accurately without damaging the piece in front of you.
Related Articles
A brad nailer pairs naturally with several trim and cabinet projects. The wainscoting and chair rail installation guide shows where an 18-gauge nailer shines on battens and panel molding. For heavier trim, the baseboard installation guide explains when a finish nailer is the better tool. If you are building cabinets or built-ins, the custom bookshelves guide and kitchen cabinet building guide both show how nailers, glue, and clamps work together in real projects.

The Carpenter's Guide Editorial Team
Independent trade-focused editorial team