Jack plane vs. smoothing plane: Which should you choose?
Quick answer
Choose a No. 5 jack plane for rough stock, moderate flattening, and general bench work. Choose a No. 4 smoothing plane for the final light passes on a surface that is already flat. If you can own only one, a jack plane with separate roughing and smoothing irons is the broader compromise, but changing the iron does not shorten its sole.
Common questions
- Should I buy a jack plane or smoothing plane first?
- Buy a No. 5 jack plane first if you prepare rough or uneven stock by hand. Buy a No. 4 smoother first if machines already deliver flat, dimensioned boards and you mainly remove mill marks or prepare final surfaces.
- Can a jack plane be used as a smoothing plane?
- A sharp jack plane with a nearly straight iron and shallow cut can smooth an already-flat board. Its longer sole will not follow small hollows or work confined areas as readily as a dedicated smoother.
- What is the size difference between a No. 4 and No. 5 plane?
- Stanley describes smoothing planes as generally 8 to 10 inches long and jack planes as generally 14 inches long. Exact dimensions, blade widths, and weights vary by manufacturer and model.
Source note: Plane definitions, dimensions, configurations, and setup guidance were checked against current Stanley, Lie-Nielsen, and Veritas manufacturer sources on September 2, 2026. This is an evidence-based comparison, not a first-hand product test.
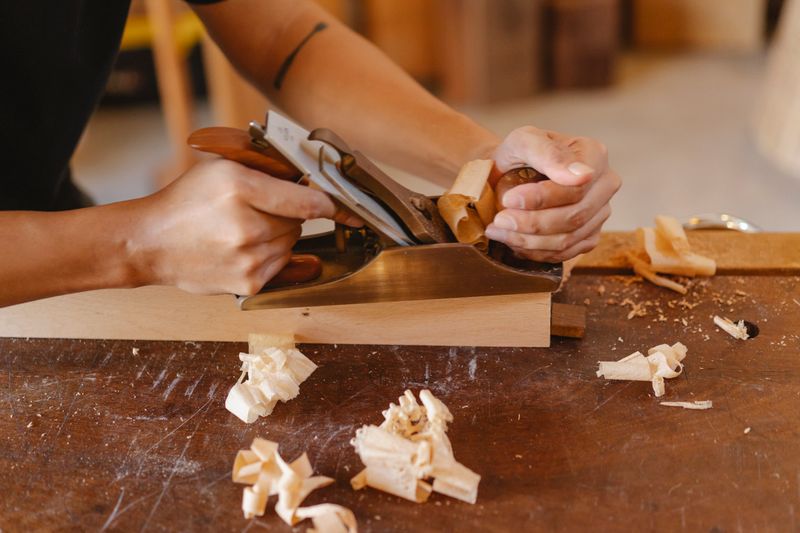
Choose a jack plane for stock preparation and a smoothing plane for the final surface. A No. 5 jack suits rough, cupped, or twisted boards; a No. 4 smoother suits machine-flattened stock that needs mill marks removed or finish-ready shavings.
Jack plane vs. smoothing plane at a glance
| Task | No. 5 jack plane | No. 4 smoothing plane | Better choice |
|---|---|---|---|
| Rough thicknessing | Cambered iron and heavier cut remove wood efficiently | Short sole and fine setup are inefficient | Jack |
| Flattening a moderate board face | Longer sole helps bridge low areas while cutting high areas | Short sole follows local surface changes more readily | Jack, with frequent checks |
| Straightening a moderate edge | Useful when the edge is within its practical scale | Better for local fitting than establishing a long reference | Jack |
| Jointing long edges or panels | Can work within limits, but is not a long jointer | Too short to be the primary reference | Jointer plane or another verified method |
| Removing mill marks from flat stock | Works with a fine iron and shallow cut | Short, fine-set body is easier to use locally | Smoother |
| Final solid-wood surface | Can do acceptable work after retuning | Designed for the last light passes | Smoother |
The usual hand-preparation sequence is jack, longer jointer or try plane when required, and smoother last. A Popular Woodworking stock-preparation reference describes the same division.
Hand plane sizes explained
Stanley’s current plane definitions describe jack planes as generally 14 inches long and smoothing planes as 8 to 10 inches long. Those are categories, not universal product dimensions.
For a current manufacturer example, Lie-Nielsen lists its No. 4 smoother at 9-1/2 inches long with a 2-inch blade. Veritas lists its bevel-up low-angle jack at 15 inches long with a 2-1/4-inch blade. The latter is not a conventional bevel-down No. 5; it shows why the model’s own specifications and instructions matter more than its nickname.
The broader hand plane types guide explains No. 4, No. 5, No. 7, block, shoulder, and router planes.
What sole length can—and cannot—correct
A longer sole tends to contact high areas on either side of a hollow, so the iron cuts those high areas before reaching the low spot. That makes a jack more useful for improving moderate-scale flatness. A short smoother registers on less of the board and can reach local areas a longer plane skips.
Neither sole guarantees a flat board. The result also depends on pressure, grain direction, blade projection, workpiece support, and repeated checks with a straightedge and winding sticks. Mark high spots with tools from the marking and measuring guide and stop when the reference checks—not the shaving pile—show that the face or edge is ready.
Set up each plane for its actual job
Roughing setup for a jack plane
- Use a sharp, cambered iron so the center cuts while the corners avoid deep tracks.
- Open the mouth only as much as needed to pass the thicker shaving without clogging.
- Advance the iron for a purposeful cut, then reduce the depth as the board approaches the target.
- Work high areas across or diagonally to the grain when appropriate, then make lighter passes nearer the grain direction.
Camber is a task choice, not permission to use a dull iron. Lie-Nielsen’s compatible roughing blade for its No. 4 and No. 5 is one example; do not assume it fits another plane.
Fine setup for a smoothing plane
- Hone the iron very sharp and keep the edge nearly straight, with the corners lightly relieved to avoid plane tracks.
- Retract the iron, then advance it to take a shallow, even shaving.
- Set the mouth and chipbreaker as the exact model’s instructions specify for a fine cut.
- Plane with favorable grain where possible; reverse direction before forcing a deeper cut through tearout.
Lie-Nielsen describes its No. 4 as a 45-degree, bevel-down plane and recommends moving the chipbreaker closer than its general-work position for the finest smoothing. A bevel-up plane changes cutting angle through the bed and blade bevel instead. Follow the full chisel and plane-blade sharpening workflow rather than transferring one maker’s angles or adjustments to every plane.
A five-step stock-preparation flow
- Read and mark the board. Check cup, bow, twist, grain direction, and thickness. Confirm the stock is conditioned for the project; the wood movement guide explains why moisture changes can undo careful milling.
- Secure the work. Use a sound vise, dogs, stops, or clamps that keep the board from sliding or tipping without entering the plane’s path.
- Remove the high areas. Use the roughing jack setup for controlled material removal. Recheck winding sticks and a straightedge often.
- Establish the required reference. Switch to a finer jack setup or an appropriately long jointer when the board length, edge, or tolerance requires it. Mark and measure again before reaching final thickness.
- Refine the surface. Use the smoother only after the geometry is acceptable. Take the minimum number of light passes needed for the finish schedule.
A smoother should not erase a layout error or rescue a still-twisted board. A jack should not keep cutting after the reference face and thickness are established.
The one-plane, two-iron compromise
If the budget permits one bench plane, a No. 5 with two compatible irons covers the widest range:
- Roughing iron: pronounced camber for stock removal.
- Fine iron: nearly straight edge with relieved corners for light passes.
Retract the blade before changing it, follow the assembly procedure, and reset lateral position, projection, mouth, and chipbreaker as applicable. Test on scrap. A second complete assembly may speed swaps on some bevel-down models, but verify compatibility.
This compromise works best when the surface is already flat enough for the longer sole. It does not make the jack as agile on small parts, local hollows, or assembled work as a No. 4. Conversely, buying a No. 4 with a coarse iron does not give its short sole the referencing behavior of a jack.
Plane-choice worksheet
Complete this before buying a first or second bench plane:
| Decision input | Your project | What it points to |
|---|---|---|
| Stock condition: rough/twisted or machine-flat? | ___ | Rough favors jack; flat favors smoother |
| Longest face and edge prepared by hand | ___ | Moderate work may suit a jack; long work may require a jointer |
| Required result: geometry or final surface? | ___ | Geometry favors jack; final surface favors smoother |
| Typical part size and access | ___ | Small or confined work favors the shorter plane |
| Will you maintain and swap two irons? | ___ | Yes supports the one-jack compromise |
First-plane decision: choose the tool supported by at least three rows. Second-plane decision: add the plane that removes the most frequent remaining compromise. If rough stock, long edges, and final show surfaces all recur, the honest answer may be a jack, jointer, and smoother used in sequence—not one plane forced into every role.
Safety boundaries
A plane iron can cut hands as readily off the tool as on the board. Secure the work before every pass, keep hands behind the cutting edge, and never hold a short or narrow piece in the plane’s path. Retract or remove the iron before clearing a clog or adjusting the frog or mouth as directed by the manual.
Handle a loose iron by its sides with the edge pointed away from you. Protect the edge during storage, and keep the bench clear so a sharp blade cannot be hidden under shavings. Inspect vintage planes for cracked castings, damaged totes, loose hardware, and unsafe repairs before use. The current manual for the exact plane controls assembly, adjustment, maintenance, and any model-specific warning.
Sources and scope
This comparison is based on published guidance, not first-hand product testing:
- Stanley plane-type definitions
- Lie-Nielsen No. 4 smooth plane specifications and instructions
- Lie-Nielsen No. 4 or No. 5 roughing blade
- Veritas low-angle jack plane specifications and care guidance
- Popular Woodworking stock-preparation reference
Specifications, compatibility, and availability can change. Verify the current manufacturer page and manual before buying blades, chipbreakers, frogs, or accessories.
Choose for the board in front of you
For rough or mixed stock, start with the jack and add a smoother when final-surface work becomes the bottleneck. For machine-prepared stock and local finish work, start with the smoother and add a jack when you need to correct geometry by hand.
Use the worksheet on your next three projects. Repeated needs will make the right first—or second—plane clearer than a universal shopping list.

The Carpenter's Guide Editorial Team
Independent trade-focused editorial team