Mortise and tenon vs. dowel joint: Which should you use?
Quick answer
Choose a traditional mortise and tenon when broad shoulders, racking resistance, and adaptable geometry justify the fitting work. Choose dowels when a good jig, modest tooling, and repeatable drilling suit the stock and load. Choose a loose tenon when you want mortise-based geometry with faster batch production. Strength depends on the complete joint design, material, adhesive, fit, and workmanship—not the joint name alone.
Common questions
- Are mortise and tenon joints stronger than dowel joints?
- Not in every design or test. A well-proportioned mortise and tenon offers broad glue surfaces and useful shoulders, while multiple long dowels can also make a strong joint. Stock, species, joint dimensions, grain direction, adhesive, fit, workmanship, and load direction can change the result.
- Can dowels replace mortise and tenon joints?
- Often, yes, for furniture frames, face frames, doors, and cabinets when the stock is thick enough for properly spaced dowels and an accurate jig. Traditional mortise and tenon joinery remains preferable when the geometry, visible detail, mechanical locking, or repair plan matters.
- Is a loose tenon the same as a dowel joint?
- Both place a separate piece into matching holes, but a loose tenon is usually wider and flatter while a dowel is cylindrical. That difference affects glue area, mortise preparation, alignment options, tooling, and how much sound wood remains around the joint.
Source note: This comparison was checked on October 23, 2026, against current search results, published joint-test methods, Fine Woodworking guidance, and OSHA woodworking safety materials. It is a design aid, not structural engineering or a hands-on load test.
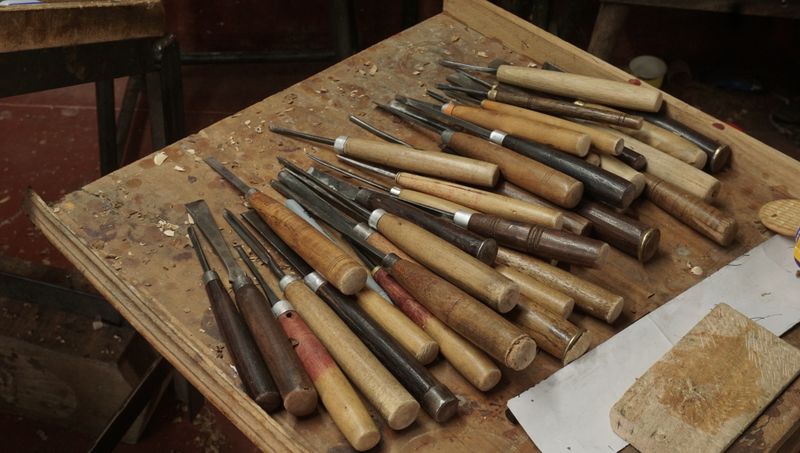
Choose the joint around the stock, load path, production method, and repair plan. Traditional mortise and tenon suits substantial rails and stiles exposed to racking. Dowels suit accurately jigged holes with sound wood around them. Loose tenons provide mortise-based geometry without cutting an integral tenon on every rail.
There is no universal strength winner. Species, grain direction, dimensions, spacing, adhesive, moisture condition, fit, and workmanship can matter more than the joint label.
Mortise and tenon vs. dowel joint at a glance
| Decision factor | Traditional mortise and tenon | Loose tenon | Dowels |
|---|---|---|---|
| Best fit | Furniture frames, doors, and visible joinery | Repeated solid-wood frames | Face frames, cabinets, and small furniture |
| Stock thickness | Needs room for a tenon and sound mortise walls | Needs two mortises plus sound walls | Works in relatively narrow stock when dowel diameter and spacing leave sound wood |
| Load path | Broad tenon and shoulders can resist shear and racking | Wide inserted tenon can serve a similar role | Several cylinders share the load; layout and edge distance are critical |
| Tooling | Saw and chisels, router jig, or mortiser | Router jig or dedicated loose-tenon machine | Drill, suitable bits, depth stops, and an accurate doweling jig |
| Repeatability | Excellent with jigs; slower by hand | Excellent after setup | Excellent from consistent reference faces |
| Dry fit | Integral tenon is easy to inspect and tune | Predictable with test tenons and controlled mortise width | Can bind early; test pieces and controlled hole depth matter |
| Repair potential | Unglued keyed versions can be demountable; glued blind joints are not automatically repairable | Usually concealed and difficult to access after glue-up | Often requires drilling out old dowels and restoring damaged holes |
| Skill and time | Highest layout and fitting demand | Moderate technique with higher tool or jig investment | Accessible, but inaccurate holes compound quickly |
For cutting methods and tenon types, use the complete mortise-and-tenon guide.
How stock thickness changes the choice
The joint must leave enough sound wood around every mortise or hole. A traditional rule of thumb starts a tenon near one-third of solid-stock thickness, but that is a layout starting point, not a structural guarantee. A thin rail may not have enough material for a useful tenon plus durable mortise walls.
Dowels can fit narrower parts, but an oversized dowel or crowded holes can split the part or leave a weak web. Fine Woodworking’s dowel guidance suggests a diameter around half the workpiece thickness as a furniture starting point; check that against the species, grain, jig, and proven plan.
Loose tenons need adequate walls on both mating pieces. For thin stock, select a smaller approved size, change the joint, or increase the part thickness.
Plywood edges, MDF, and particleboard do not behave like clear solid wood. Follow the panel and connector manufacturer’s edge-distance and adhesive guidance.
Follow the grain and the load path
A table apron, chair rail, or door rail usually meets a leg or stile at 90 degrees. In service, that corner may face racking, bending, shear, and withdrawal, not one simple pull.
A traditional tenon offers broad cheeks and shoulders. A loose tenon puts a wide insert into both parts. Dowels divide the connection among smaller cylinders, making their length, number, spacing, accuracy, and surrounding grain important.
A wider tenon may help a pull-apart sample but remove too much wood from a narrow stile. More dowels may add glue area but weaken the wood between holes. Soft species may crush; brittle or short-grained stock may split first.
For safety-critical work, never convert a magazine test into an allowable load. Use an established design, applicable code, manufacturer instructions, or a qualified designer.
What published strength tests actually show
In a Canadian Woodworking dowel-joint test, a fixture loaded 90-degree rail-to-stile samples made from 3/4-inch clear, flatsawn red oak. Each design had five PVA-glued samples. Three 3/8-inch by 2-inch dowels averaged 650 pounds at failure; a 3/8-by-2-by-1-inch mortise and tenon averaged 500 pounds. That applies only to those materials, dimensions, samples, preparation, and fixture.
WOOD Magazine’s joint torture test took more than 100 samples to a university lab and used separate shear and pull-apart fixtures. Its examples show that load direction and tenon width changed failure results. They are comparisons, not engineering design values or proof of a universal winner.
Tooling, skill, and repeatability
Choose a traditional mortise and tenon when fitting is part of the work
Hand tools allow one-off joints and visible through-tenons. A router, drill press plus chisels, or hollow-chisel mortiser speeds production; the mortiser vs. drill press comparison explains that choice. This method demands accurate reference faces and shoulders, but lets you tune the cheeks directly.
Choose dowels when the jig solves the layout problem
A doweling jig, suitable bits, depth stops, and one marked reference face can make repeatable joints with affordable tools. The holes must align in position, angle, and depth. Switching reference faces can create a visible step.
Dowels align glue-ups but leave little sideways adjustment. Test representative scrap, allow room for the connector and excess glue, and use dowels and adhesive intended for the material.
Choose a loose tenon for repeatable mortise-based production
A router jig or loose-tenon joiner cuts mating mortises for a separate insert. Some systems permit one precise mortise and one wider mortise for adjustment; use only settings allowed by that system.
If you are comparing proprietary loose-tenon tooling with alignment-focused biscuits, see the biscuit joiner vs. Domino guide.
Glue surface, fit, and clamp planning
Traditional and loose tenons can provide broad long-grain contact. Dowels spread contact across round holes. Torn walls, crushed fibers, a starved joint, bottomed-out parts, or an open shoulder can erase a theoretical advantage.
Before glue-up:
- Mill the parts square and mark one reference face and edge.
- Cut a sample joint in offcuts from the project stock.
- Dry-assemble the whole frame and check diagonals, shoulders, and clamp access.
- Confirm the joint seats without dangerous force and without bottoming out.
- Follow the adhesive maker’s instructions for spread, open time, pressure, temperature, and cure.
The wood glue guide covers adhesive tradeoffs. Use controlled pressure to seat the parts and close glue lines without bowing a rail or launching a clamp; more pressure does not guarantee more strength.
Which joint is easier to repair?
Adhesive, access, finish, and intentional disassembly matter more than shape alone. An unglued keyed tenon can be serviced, while a glued blind or loose tenon is buried. Failed dowels can be drilled out, but an off-center repair may enlarge holes or alter the frame.
If future repair matters, choose a reversible detail and document hidden joinery. Review wood movement and grain direction before joining wide components.
Power-tool and clamping safety
Follow the manual for the exact drill, drill press, router, mortiser, jig, cutter, and accessory. Guards and workholding are part of the setup.
- Clamp the work. OSHA warns that drill-press stock can catch and spin when held by hand. Secure the workpiece and any jig or fence so the cutter cannot turn them into a rotating hazard.
- Keep guards in place. Use the machine’s specified point-of-operation and power-transmission guards. Never reach past a moving cutter or defeat a switch.
- Disconnect before adjustments. Isolate power before changing bits, clearing jams, aligning cutters, or working near cutting edges. Remove keys and tools before restart.
- Control router feed and templates. Secure the stock or template, use the correct feed direction, and do not plunge or feed abruptly.
- Protect yourself. Wear eye protection, manage hearing and wood-dust exposure, secure long hair and loose clothing, and keep hands out of the cutting path.
- Plan the glue-up. Keep clamp bars and handles clear of walking paths, support the assembly, tighten gradually from stable positions, and stop if a part or clamp starts to slip.
OSHA’s guidance for drill presses and routers describes the workplace hazards behind those controls. It does not replace the manufacturer’s instructions.
A practical selection rule
Choose a traditional mortise and tenon for substantial frames, demanding racking loads, visible joinery, or custom shoulders, haunches, pins, wedges, or keys. Choose dowels when edge distances permit a proven layout and the jig can reference every part consistently. Choose a loose tenon when a batch justifies the jig or machine and a wide insert fits the material and load.
Your next step: draw the joint full size and label stock thickness, grain, expected load, connector dimensions, edge distances, reference faces, glue area, clamp positions, and future access. Then cut one joint of each realistic option in project offcuts and compare fit, squareness, assembly time, and remaining wood. That mock-up checks your process; it is not a certified load test.

The Carpenter's Guide Editorial Team
Independent trade-focused editorial team