Dovetail Joints: Step-by-Step Guide for Beginners and Pros
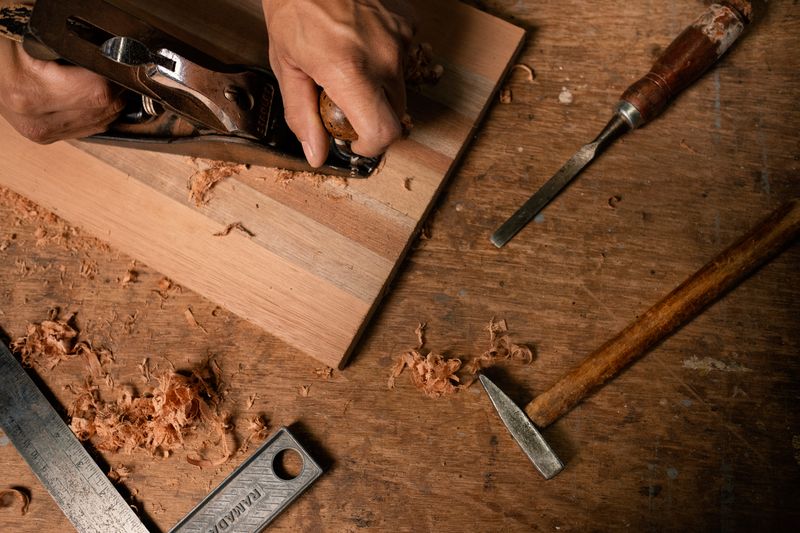
No joint in woodworking is more iconic than the dovetail. When a craftsman runs a hand across a beautifully fitted row of interlocking tails and pins — the trapezoidal shapes locked together in mechanical opposition — there is an unmistakable recognition: this is what woodworking looks like at its best.
But the dovetail is not merely decorative. It is a masterpiece of mechanical engineering. The angled shape of the tails means the joint physically cannot be pulled apart in the direction of the greatest stress on a drawer or box — the front-to-back direction. The gluing surface is enormous. And when cut by hand, the subtle variations in spacing and the refined line left by a sharp saw are a direct expression of the maker’s hand.
This guide covers every type of dovetail joint, the layout ratios and techniques that make them work, a complete hand-cut method for beginners, and a practical look at dovetail jigs for machine-cut work.
Why Dovetails?
Mechanical Advantage
The dovetail’s angled geometry means that in the direction of greatest stress — the tension that would pull a drawer front off its sides — the joint mechanically locks. The angled faces of the tails bear against the angled faces of the pins, converting tension into compression. You cannot pull a dovetail apart along its primary axis without destroying the wood.
Compare this to a butt joint, a box joint, or even a rabbet: all of these can be pulled apart by the forces that act on a drawer front. The dovetail alone resists them with pure geometry, independent of the glue.
Historical Background
Dovetail joints have been found in ancient Egyptian furniture, in Chinese dynasty cabinets, and in medieval European woodwork. They were the standard method for joining drawer boxes in European cabinetmaking from the 17th through 19th centuries, and they remain the mark of quality hand-crafted furniture today.
The development of precision woodworking machines in the 20th century made machine-cut dovetails possible (and opened a long debate in woodworking communities about hand-cut vs. machine-cut). Today, both methods are widely used and both produce excellent results — they just have different aesthetics and require different skills.
Gluing Surface
In addition to mechanical locking, the dovetail presents a very large gluing surface. The angled faces of each tail and pin are long-grain surfaces — where wood glue is strongest. A row of six dovetails in a 6” wide drawer side can have several square inches of effective long-grain gluing surface, making the joint enormously strong even before the mechanical interlocking is considered.
Types of Dovetail Joints
Through Dovetail
The most common form. The tails (cut in one board, typically the drawer side or box side) pass completely through the pin board (the end of the drawer front or box front), and the joint is visible from both faces. The end grain of the tails shows on the face of the pin board.
Through dovetails are used for: box corners, carcase corners, the back of drawers (where the joint is not seen from outside), visible corner joints in Arts and Crafts furniture where the exposed joint is a design feature.
Half-Blind Dovetail
The most common joint for drawer fronts. The tails pass into the pin board but stop short of the face — a thin “lip” of wood hides the joint from the front of the drawer. From the front, you see only a clean face. The joint is visible from the side.
Half-blind dovetails require more layout care and more precise chopping to the baseline without going through the face, but they are not significantly more difficult than through dovetails once the technique is understood.
Sliding Dovetail
A sliding dovetail is a socket (a female dovetail-shaped groove) cut into one piece, with a matching dovetail-shaped tongue cut on the end of another piece. The tongue slides into the socket from the end. Used for: attaching shelves to carcases (the shelf cannot bow outward), breadboard ends on tabletops, connecting a drawer web frame to a carcase side.
Sliding dovetails are typically cut with a router and dovetail bit, though they can be cut by hand with a dovetail plane.
Mitered Dovetail
A mitered dovetail (also called a secret mitered dovetail) is the most complex variant. The joint is mitered on the outside corner — from both external faces, it appears to be a simple 45° miter. Inside, dovetail pins and tails provide the mechanical strength. The joint hides all end grain. Used for the highest-end decorative casework where no joint should be visible.
Layout: Ratios, Spacing, and Baselines
Tail Angle (The Ratio)
The dovetail angle is expressed as a ratio: the horizontal run to the vertical rise.
- 1:8 ratio (about 7°): Standard for softwoods. The shallow angle is appropriate because softwood compresses under the steep shoulder of a tighter ratio, reducing strength.
- 1:6 ratio (about 9.5°): Standard for hardwoods. The steeper angle creates a more positive mechanical lock in wood stiff enough to resist compression.
You can cut the same angle regardless of wood species and the joint will work — these ratios are guidelines, not laws. Many woodworkers choose one ratio and use it universally.
To set your bevel: Mark a line at 1” from the baseline. Step 6” or 8” along that baseline. Connect the marks. This gives you a 1:6 or 1:8 line to set your sliding bevel against.
Spacing the Tails
There is no single rule for tail spacing — this is where individual style comes through. Common approaches:
- Equal spacing: Divide the board width into equal sections, all tails the same size and spacing. Clean, geometric look.
- Unequal spacing: Traditional English cabinet making varied tail widths across a board for aesthetic interest and to follow the structural logic of the piece.
- Half-pin at each end: Always start and end with a half-pin (a narrower pin at the edge of the board) — this maintains the mechanical lock and prevents the corner from splitting.
Practical layout with dividers: Set dividers to the combined width of one tail and one gap. Step them along the board to divide it evenly. This takes the math out of spacing and is the traditional method.
The Baseline
The baseline is the most critical line in dovetail layout. It is the line across the face and edges of each board that defines the depth of the joint — where the tails end and the pins begin.
Mark the baseline with a cutting gauge set to exactly the thickness of the mating board (a hair more is acceptable; less means the joint will not seat fully). Score this line all the way around all four faces of each board. The baseline is the line your chisel will pare to — it must be crisp, straight, and consistent.
Hand-Cut Dovetails: Step by Step
Tools Required
- Marking knife
- Cutting gauge or wheel gauge
- Sliding bevel set to your ratio
- Dovetail saw or fine-tooth back saw (Dozuki also works well)
- Sharp bench chisels (1/4”, 1/2”, 3/4” minimum)
- Mallet
- Marking pencil or chalk for waste side marks
Step 1: Mark the Baseline on All Boards
Set your cutting gauge to the thickness of the mating board plus 0.5mm (the slight extra ensures the joint fully seats). Score a baseline all the way around both the tail board and the pin board. This is your critical reference line.
Step 2: Lay Out the Tails
Mark the tail positions across the end grain of the tail board using a pencil and your sliding bevel. Mark which side of each line is waste — a small X or hatching in the waste section prevents confusion at the saw.
Step 3: Saw the Tails
Clamp the tail board vertically in a vise, angled so that the cut line you are sawing is vertical in front of you (this makes it easier to keep the saw plumb). Use a dovetail saw and saw on the waste side of each line — the kerf should just touch the line, not remove it.
Saw all left-leaning cuts first, then reclamp at the opposite angle and saw all right-leaning cuts. Keep the saw in the wood — do not let it wander past the baseline.
Step 4: Remove the Waste Between Tails
Two methods:
Method A — Coping saw: Cut across just above the baseline between each tail with a coping saw, removing the bulk of the waste. Pare the remaining waste down to the baseline with a chisel.
Method B — Chop only: Work from both faces, chopping halfway through from each side with a chisel and mallet. Drive the chisel into the baseline first to establish a registered edge, then undercut slightly behind it to clear the waste. Work in small increments.
In both cases, the final paring should be done with a sharp chisel held flat on the baseline, slicing cleanly to the scored line.
Step 5: Transfer to the Pin Board
This is the step that makes hand-cut dovetails self-fitting.
Stand the pin board vertically in a vise or hold it upright in a bench hook. Lay the tail board on top of it, aligning the baseline of the tails exactly with the face of the pin board. Hold everything firmly and use a marking knife to scribe the tail outlines directly onto the end grain of the pin board. This transfers the exact shape of the tails — with all the slight variations that come from hand cutting — to the pins.
Square down from the knife marks on the end grain using a square and knife, and mark the waste sides clearly.
Step 6: Saw the Pins
The pins are typically narrower than the tails, which makes sawing them harder — there is less room for the saw. Saw straight down each line, keeping your cuts plumb and stopping at the baseline.
Remove waste between pins exactly as you removed waste between tails. The half-pins at each edge can be removed with a single chisel stroke.
Step 7: Test Fit and Pare to Fit
Bring the two boards together for a test fit — do not tap with a mallet yet. If they do not go together by hand pressure, look for shiny areas on the tail faces where they are contacting the pins. These are the high spots to pare.
Make one light shaving, test again. Repeat. The target fit is: goes together firmly with hand pressure, feels solid, no slop. A mallet-driven fit that is too tight can split the pin board.
Step 8: Glue-Up
Apply glue to the pin faces and the tail faces (all the angled mating surfaces). Do not apply glue to the baseline shoulders — glue there can hydraulically stop the joint from seating fully.
Tap the joint home with a mallet, protecting the wood with a scrap block. Clamp if needed, check for square, allow to cure.
Machine Methods: Dovetail Jigs
Router Dovetail Jigs
A dovetail jig guides a router to cut pins and tails simultaneously. Most jigs cut half-blind dovetails only — the classic drawer joint — using a dovetail bit in the router.
Types of dovetail jigs:
- Fixed-spacing jigs (Porter-Cable 4212, Craftsman): Fast and simple. Both boards are clamped at the same time and the router makes a single pass. Spacing and size are fixed by the template — you get equal tails every time.
- Variable-spacing jigs (Leigh D4R, Keller): Allow you to vary the spacing and size of tails independently. These produce more hand-cut-looking results but require more setup time. The Leigh D4R is the benchmark in this category — adjustable, versatile, and capable of cutting through dovetails, half-blinds, and sliding dovetails.
Router Table Method
A router table with a dovetail bit and a consistent fence can cut sliding dovetails very accurately. For through dovetails, some woodworkers use a dedicated fence setup to rout the tails, then hand-cut the pins (since they are easier to cut by hand).
Common Dovetail Mistakes and Fixes
| Mistake | Cause | Fix |
|---|---|---|
| Gaps at baseline | Chisel stopped short of baseline | Pare carefully with flat chisel to scored line |
| Pins too tight | Too little paring after transfer | Pare small amounts, test repeatedly |
| Saw went past baseline | Not watching baseline while sawing | Sand or plane joint face flat, recut |
| Tails not square to face | Saw angle drifted | Mark both faces, saw to the line on each side |
| Joint rocks (does not sit flat) | Baseline not consistent | Flatten baseline with router plane |
| Gaps between mating faces | Baseline set too short | Shim, fill, or recut |
Top Picks: Dovetail Saw and Jig
For hand-cut dovetails, the Suizan Japanese Dovetail Saw is an excellent entry point — fine-toothed, thin kerf, and capable of cuts that rival saws costing three times as much.
For machine-cut work, the Leigh D4R Pro is the gold standard jig for woodworkers who want flexibility beyond the fixed-template jigs.
Conclusion
Dovetails reward the time invested in learning them. For machine-cut work, a good jig and a sharp dovetail bit produce reliable results quickly. For hand-cut work, the learning curve takes a few sessions — expect your first practice joints to be imperfect. That is exactly right. By the fifth or sixth try, the techniques will begin to feel natural: the sawing angle, the chisel work at the baseline, the careful paring to fit.
When you finally push together a hand-cut dovetail joint that closes smoothly and sits perfectly flush, with the angled faces bearing evenly and no gaps at the baseline, it is one of the most satisfying moments in woodworking. The joint has been refined over centuries because it works — and because it is beautiful.
Related Articles

The Carpenter's Guide Editorial Team
Independent trade-focused editorial team