Essential Marking and Measuring Tools for Woodworkers
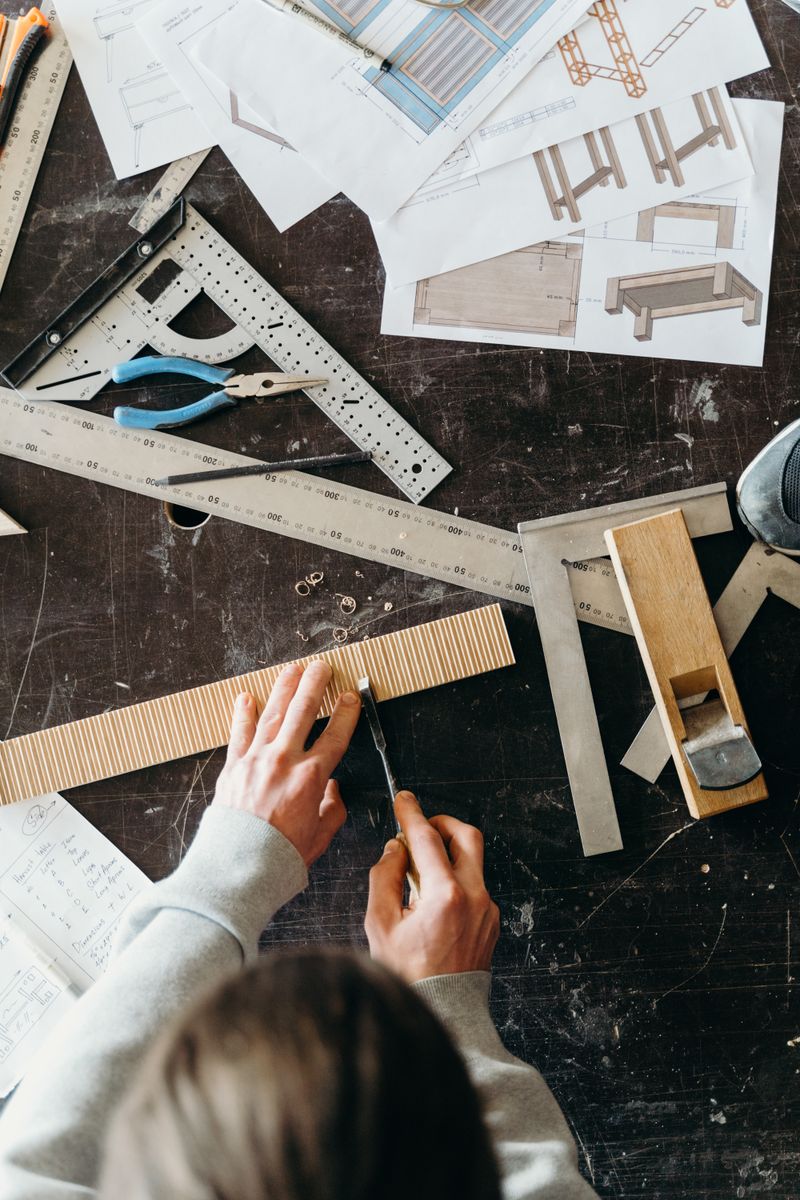
“Measure twice, cut once” is the oldest advice in carpentry, and it endures because it is absolutely true. But measuring is only half the equation — the other half is marking. How accurately you transfer a measurement to the wood, and how clearly that mark registers against your saw line or plane edge, determines whether your joints fit or gap, whether your cabinet is square, and whether your shelves are level.
The good news is that a relatively small collection of marking and measuring tools covers nearly everything a woodworker needs. The bad news is that quality varies enormously in this category, and the difference between a $12 combination square and a $90 one is not cosmetic — it is real, measurable accuracy that compounds across every project you build.
This guide covers the essential measuring and marking tools every woodworker should own, what to look for when buying, and which brands and models deliver genuine value.
Why Precision in Marking Matters More Than You Think
Power tools are only as precise as the layout they are following. A table saw cut is repeatable, but if the measurement you drew was off by 1/32”, every piece cut to that line will be wrong. In joinery, errors multiply: a mortise marked 2mm off its position throws the entire frame out of square, and no amount of clamping pressure will fix a joint that was marked wrong before the first chisel stroke.
This is why professional woodworkers invest in high-quality marking and measuring tools before buying expensive machines. A $90 Starrett combination square will improve the accuracy of a $400 table saw more than a $400 table saw will improve the accuracy of a $12 square.
Combination Squares
The combination square is arguably the single most important measuring tool in the woodworking shop. A quality combination square does the work of a try square, a depth gauge, a miter square, a scribe, a marking gauge, and a rule — all in one compact tool.
What a Combination Square Does
- Checks and marks 90° and 45° angles
- Measures and marks depth (set the rule to a dimension, lock it, and scribe along the face)
- Acts as a depth stop gauge for mortises and dados
- Checks the squareness of machine fences, table saw blades, and router table setups
- Scribes parallel lines along an edge when used as a marking gauge
Starrett vs. Budget Squares
Here is the honest truth about combination squares: cheap ones are almost always inaccurate, and that inaccuracy destroys the trust you need to have in a measuring tool.
A Starrett No. 11H or No. 33H is the gold standard. The head is ground to within 0.001” of square. The rule is laser-engraved and precisely graduated. The locking mechanism holds firmly without slipping. Buy one and it will outlast you.
Mid-range alternatives:
- Empire and General Tools make decent combination squares in the $25–45 range. Check squareness against a known reference before relying on one.
- Woodpeckers (when available during their “one-time tools” runs) makes excellent aluminum combination squares that rival Starrett at about half the price.
How to test a combination square for accuracy:
- Hold the head against a flat reference surface (machine table or jointed board).
- Mark a line along the rule.
- Flip the square — rotate it 180° — and align the head to the same reference surface.
- If the rule aligns with your marked line, the square is accurate to 90°. Any gap is double the actual error.
Always test a square before trusting it.
Marking Gauges
A marking gauge scribes a line parallel to an edge at a set distance. It is essential for laying out mortises, tenons, rabbets, and any joint that requires a precise offset from a face or edge.
Pin Gauge (Traditional)
The classic marking gauge has a pin (a sharp metal point) that drags along the wood surface. Pin gauges are inexpensive, widely available, and work adequately. The downside: the pin tends to follow grain rather than cut cleanly across it, and it can cause tearout on figured or cross-grain work.
Cutting Gauge
A cutting gauge replaces the pin with a small, single-bevel blade. The blade slices cleanly across grain rather than dragging, producing a clean, knife-fine line with no tearout. This is the version to use when marking tenon shoulders, the baseline for dovetails, or any mark that will be followed by a chisel.
Wheel Gauge (Marking Wheel Gauge)
The wheel gauge uses a small circular blade — like a tiny pizza cutter — that rotates as it scribe. It works in both directions along the grain and across it, making it the most versatile of the three types. The Veritas Wheel Marking Gauge is the benchmark in this category: the micro-adjustable stem, fine-threaded locking mechanism, and wear-resistant wheel make it a pleasure to use.
Mortise Gauge
A mortise gauge has two scribers (or blades) on the same stem, both adjustable, so you can mark both sides of a mortise in a single pass. This ensures the mortise is centered (or offset to any consistent position) and both walls are marked simultaneously. Essential for any mortise and tenon work.
Sliding Bevels
A sliding bevel (also called a bevel gauge or T-bevel) is an adjustable angle gauge with a locking blade that can be set to any angle and used to transfer that angle to the workpiece or check it repeatedly throughout a project.
Uses include:
- Setting and checking dovetail angles
- Transferring an angle from one board to another (e.g., angled chair legs)
- Setting compound angles for miter cuts
- Checking the pitch of a roof or ramp angle
What to look for: A sliding bevel with a solid locking mechanism (lever or screw) that does not slip under use. The blade should have a small cutout so it can register against the corner of a board. Lie-Nielsen and Veritas both make excellent sliding bevels; the Japanese equivalent (the kebiki-style bevel) is worth exploring for dedicated hand-tool work.
Dividers and Wing Compasses
Dividers look like a compass but both legs are pointed metal — no pencil. They are used to:
- Step off equal divisions along an edge (divide a board into 5 equal parts without math)
- Scribe a line parallel to an irregular edge (set the dividers to the offset, walk one leg along the edge while the other scribes)
- Transfer a measurement from a rule to the workpiece without reading a number
- Test spacing consistency in joinery layouts
Wing compasses (also called spring compasses) have a bowed spring between the legs and a locking screw — they hold their setting more securely than friction-fit dividers. Starrett makes excellent dividers; many woodworkers use vintage machinist’s dividers bought at flea markets.
Dividers are profoundly useful once you start using them. Many experienced woodworkers do entire project layouts with dividers and a straightedge, never touching a tape measure.
Calipers
Calipers measure thickness, diameter, and depth with high precision. They are essential for:
- Measuring wood thickness to confirm it matches a target dimension
- Checking tenon thickness against mortise width
- Measuring the diameter of turned spindles
- Setting router bits and dado blades to exact depth
Digital Calipers
Digital calipers display a reading to 0.001” or 0.01mm instantly. They are fast, easy to read, and generally accurate. The main downside: batteries. Keep a spare in the shop.
Mitutoyo is the professional standard in digital calipers — the 500-series is widely considered the best combination of accuracy and longevity. For most woodworkers, a $25–40 digital caliper from iGaging or Fowler is accurate enough and works well.
Analog (Vernier) Calipers
Vernier calipers read by aligning graduation marks on the sliding scale — a learned skill, but entirely reliable with no batteries. Professionals in precision machining often prefer vernier for critical measurements; woodworkers generally find digital faster and more convenient.
Marking Knives vs. Pencils
Why Marking Knives Win for Joinery
A marking knife creates a thin, clean incised line — essentially a shallow kerf you can register a chisel into. A knife line is typically 0.3–0.5mm wide. A pencil line is 1–2mm wide and fuzzy at the edges.
In joinery, that difference compounds. If you saw to the near edge of a pencil line consistently, you might be 0.5–1mm off your target. Knife to a scribed line and you are within 0.2mm.
When to use a pencil: Layout lines that will be cut away or planed off, marking on rough lumber, quick measurements, anything where precision beyond 1mm is not required.
When to use a marking knife: Baseline for dovetails and mortise and tenon joints, shoulder lines on tenons, any line that will be pared or chiseled to.
Choosing a Marking Knife
The ideal marking knife has a single bevel (like a chisel) so the flat back can register against a square or rule. The Veritas Marking Knife and Blue Spruce Marking Knife are excellent premium options. Many woodworkers make their own from a broken chisel ground to a knife profile — perfectly functional.
Avoid double-bevel knives (like X-ACTO blades) for joinery marking — they cannot register the flat side against a reference edge.
Tape Measures
What to Look For
Not all tape measures are equal. Key features for a woodworking tape:
- Blade width: Wider blades (1” or wider) stand out longer without drooping — useful for measuring long spans without a helper.
- Hook accuracy: The hook at the end of the tape must move exactly the width of itself — forward when hooking an outside measurement, back when pressing for an inside measurement. Cheap hooks often have slop that introduces error.
- Clear markings: You want a tape that reads in both inches/fractions and metric, with clear 1/32” graduation at least in the first 12”.
- Lock: A positive blade lock keeps the tape in position while you mark.
Recommended tapes: The Stanley FatMax and Milwaukee 48-22-7125 are widely trusted. For fine work, many woodworkers prefer a steel rule for measurements under 24” — a rule has no hook and no stretching.
Door work is a useful example of why measurement scope matters: our prehung vs. slab door replacement guide shows how leaf dimensions, hinge locations, jamb condition, and rough-opening checks lead to different project decisions.
Steel Rules
A steel rule is the most precise ruler in the shop. No hook, no curve, just a precision-engraved flat steel strip. For measurements within bench-work range, a quality 12” or 18” steel rule is faster and more accurate than a tape.
Starrett makes the benchmark steel rules. The C604R is a 6” flexible rule that fits in a shirt pocket and is useful for small work; the C604-18 is the 18” version for bench layout.
Winding Sticks
Winding sticks are a pair of straight, parallel-faced sticks laid across a board at each end. By sighting across the tops, you can detect twist (winding) in a board that your eye alone cannot see. They are cheap to make (two pieces of straight MDF or aluminum bar) and profoundly useful for flattening stock.
Sight the sticks at a low angle — any twist appears as the far stick appearing tilted relative to the near stick. Once you can see wind this clearly, you know exactly where to plane.
Recommended Starter Kit for Measuring and Marking
If you are building your measuring kit from scratch, here is a practical order of acquisition:
- Combination square — Starrett 12” if budget allows, otherwise test any square you buy for accuracy
- Marking knife — single bevel, comfortable handle
- Wheel marking gauge — Veritas is the benchmark; available here
- Sliding bevel — one quality bevel gauge covers most angle needs
- Digital calipers — even a budget set improves thickness measurement
- Steel rule — 12” or 18” Starrett
- Dividers — vintage machinist’s dividers work beautifully
When Precision Matters Most
In woodworking, not every operation requires the same level of precision. Here is a rough guide:
| Task | Required Precision | Tool |
|---|---|---|
| Rough sizing lumber | ±1/8” | Tape measure |
| Crosscut to final length | ±1/32” | Combination square + marking knife |
| Mortise and tenon layout | ±1/64” | Mortise gauge + marking knife |
| Dovetail baseline | ±0.5mm | Cutting gauge + marking knife |
| Drawer fit | ±0.2mm | Calipers + combination square |
| Final planing | ±0.1mm | Calipers |
The rule of thumb: the more permanent and the more structural the cut, the more precision matters. A rough cut in the wrong place wastes wood; a structural joint cut imprecisely weakens furniture.
Conclusion
Accuracy in woodworking is not magic — it is the result of good tools, good habits, and an understanding of where errors enter the process. Invest in a quality combination square, a good marking gauge, and a marking knife, and your joinery will improve immediately regardless of what hand or power tools you use downstream.
The most precise machine in your shop is useless if it is fed imprecise layout. These tools are where accuracy begins.
Related Articles

The Carpenter's Guide Editorial Team
Independent trade-focused editorial team