Mortiser vs. Drill Press: Which Cuts Better Mortises?
Quick answer
Choose a drill press and chisels if you cut mortises occasionally and need one versatile machine. Choose a dedicated hollow-chisel mortiser when you make repeated square mortises and its fence, hold-down, depth stop, and high-leverage feed will save enough setup and cutting time to justify the space.
Common questions
- Can you cut a mortise with a drill press?
- Yes. Drill overlapping holes with a brad-point or Forstner bit, then square and smooth the mortise with a sharp chisel. A compatible hollow-chisel attachment is another option, but it takes more setup and feed force than ordinary drilling.
- Is a mortiser the same as a drill press?
- No. Both lower a rotating bit vertically, but a hollow-chisel mortiser adds a stationary square chisel, high-leverage feed, fence, hold-down, and controls intended for repeated mortising. A drill press is designed primarily for round holes and accepts a much wider range of bits.
- Is a drill-press mortising attachment worth it?
- It can be worthwhile for occasional batches when the attachment is approved for your exact drill press. Include installation, alignment, removal, and storage time in the decision; frequent mortising usually favors a dedicated machine.
Source note: Machine features, hollow-chisel setup, and drill-press safety guidance were checked against current Powermatic documentation, Woodworker's Journal guidance, and OSHA materials on August 12, 2026. Always follow the manual for your exact machine and accessory.
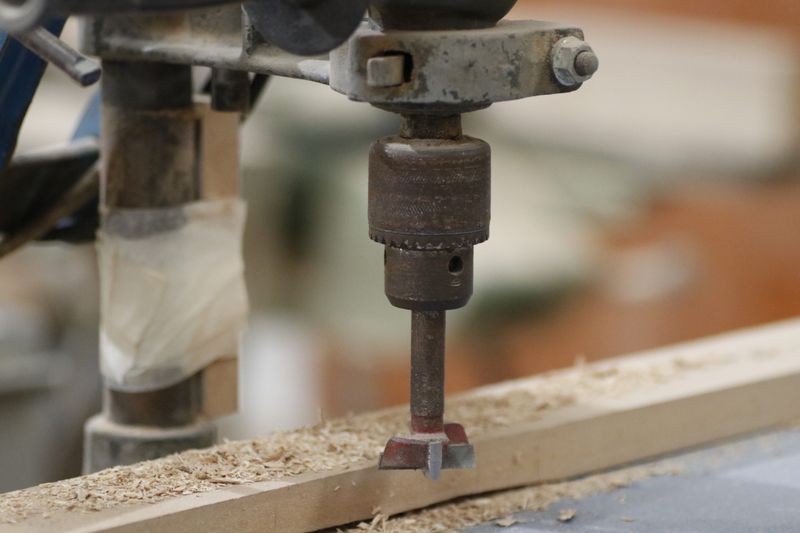
If you make a few mortise-and-tenon joints each year, keep the drill press and finish the mortises with a chisel. If chairs, doors, tables, or face frames put dozens of matching mortises on your project list, a dedicated hollow-chisel mortiser is faster to set up, easier to repeat, and better at holding the work securely.
The real question is whether the mortiser’s specialized controls save enough time to earn permanent shop space.
Mortiser vs. drill press at a glance
| Decision factor | Drill press and chisel | Drill press with mortising attachment | Dedicated hollow-chisel mortiser |
|---|---|---|---|
| Best use | Occasional mortises and general drilling | Occasional batches on a compatible machine | Repeated furniture and door joinery |
| Finished shape | Round-ended until squared by hand | Square | Square |
| Setup | Simple drilling setup, then bench work | Slowest because the attachment must be fitted and aligned | Fast after the machine is tuned |
| Feed effort | Low while drilling | Higher because the chisel must be forced into the wood | High force, but a long lever provides mechanical advantage |
| Workholding | Shop-made fence, clamps, and depth stop | Attachment fence and hold-down vary | Purpose-built fence, hold-down, and depth stop |
| Versatility | Excellent | Excellent after the attachment is removed | Limited to mortising and similar plunging work |
| Space | One versatile machine | One machine plus accessory storage | Separate bench or floor space |
| Repeatability | Good with stops and careful layout | Good after careful alignment | Best for a run of matching parts |
Best value for most small shops: use the drill press you already own until mortising becomes a repeated bottleneck. Our drill press buying guide explains the swing, quill travel, speed range, and table features that matter for its broader work.
How the two machines cut differently
A drill press rotates a bit and lowers it through the stock. For a basic machine-cut mortise, a brad-point or Forstner bit removes most of the waste as overlapping round holes. A bench chisel then removes the scallops, squares the ends, and brings the walls to the layout lines.
A hollow-chisel mortiser uses two cutters together. An auger turns inside a stationary square chisel. The auger leads slightly, removes most of the waste, and carries chips toward openings in the chisel. The chisel’s four edges follow and shear the walls square.
That action demands more downward and withdrawal force than ordinary drilling. A dedicated mortiser is built around that load. As a current example, Powermatic lists a long handle, dual-lock hold-down, rack-and-pinion fence, and in-line depth stop on its PM701. Those controls, rather than horsepower alone, explain the advantage during repeated work.
Where a drill-press attachment fits
A mortising attachment adds a chisel holder, fence, and hold-down to a drill press so the chuck can drive an auger inside a stationary hollow chisel. It can produce the same square cutting action, but compatibility is not universal.
Before buying an attachment, confirm the following in the drill-press or accessory manual:
- The quill diameter matches an included bushing
- There is enough capacity for the chisel, stock, and backing board
- The table and column can accept the fence and hold-down
- The manufacturer permits the attachment and specifies a usable speed
- You can remove and reinstall the setup without losing an unacceptable amount of shop time
Do not improvise a collar or operate a loose-fitting attachment. If the maker does not approve the combination, use the drill-and-chisel method or a purpose-built mortiser.
Which method gives the best accuracy?
All three methods can be accurate. A precise mortise depends on reference faces, sharp cutters, rigid workholding, controlled depth, and a tenon fitted to the mortise you actually cut. A dedicated mortiser mainly improves consistency across a batch.
The drill-press method lets you stay inside the layout lines and pare to the final fit. That is slower, but leaves room to correct small errors. Review the mortise-and-tenon workflow before choosing dimensions or cutting the tenon.
A hollow chisel cuts the finished width immediately. That makes a fence and stops valuable, but it also means a tilted chisel or drifting workpiece repeats the same error quickly. Make a test cut in offcut from the project stock before committing a finished part.
A practical workload test before you buy
Use this shop test instead of guessing whether a dedicated mortiser will pay for itself:
- Mark and cut four identical mortises in representative offcuts using your current drill-press method.
- Include fence setup, clamping, drilling, chisel cleanup, and the time needed to make the fourth mortise fit.
- Record the active minutes and any tapered walls, bruised edges, or inconsistent depths.
- Estimate how many similar mortises appear in a typical month or project.
- Compare the time you could realistically save with the mortiser’s purchase cost, bench footprint, cutter cost, and setup time.
A useful break-even calculation is:
Annual value of time saved = mortises per year × minutes saved per mortise ÷ 60 × your shop-hour value
This planning tool does not promise a fixed machine speed. Saved minutes may matter little to a hobbyist who enjoys hand fitting, but much more to a professional building repeated door frames.
As a rough decision rule, occasional projects with four to eight mortises rarely demand another machine. Frequent batches of identical parts are where the mortiser’s fixed setup becomes compelling.
How to cut clean mortises on a drill press
You can improve drill-press mortises without buying an attachment:
- Mill the workpiece square and mark one reference face and edge.
- Lay out the mortise with a marking gauge and knife. Keep the bit inside those lines.
- Clamp a straight fence to the table and add end stops if parts repeat.
- Clamp the workpiece; never hold it by hand. Place a backing board below a through-mortise.
- Set the depth stop slightly deeper than the tenon length so the joint can seat without bottoming out.
- Drill the ends first, then remove the waste between them with overlapping holes.
- Square the ends and pare the side walls with a sharp chisel, working from both faces on a through-mortise to reduce breakout.
- Test the tenon with hand pressure and correct high spots instead of forcing the joint together.
The chisel sharpening guide covers edge preparation and burr removal. A dull chisel increases effort and makes it harder to pare to a clean line.
When neither machine is the best answer
A plunge router with an edge guide or jig is often better for loose tenons and long, round-ended mortises. Match the tenon’s corners to the routed mortise or use manufactured loose tenons.
For portable assembly and fast alignment, compare the biscuit joiner and Domino before committing space to a hollow-chisel machine. For a one-off joint or delicate part, hand chopping may offer more control than either powered method.
Safety checks that apply to both machines
Mortising combines a rotating cutter, sharp chisel edges, chips, and substantial feed force. The machine’s manual is the controlling source for setup and safe operation.
- Disconnect power before installing, aligning, clearing, or sharpening cutters.
- Remove the chuck key and adjustment tools before starting.
- Secure the machine to a stable surface and use the guard, fence, hold-down, and clamps provided for the operation.
- Keep hands away from the rotating chuck and chisel; use a brush or vacuum after the machine stops to clear chips.
- Wear eye protection and manage hearing and dust exposure for the material being cut.
- Stop if the work lifts, the cutter overheats, chips stop clearing, or the machine vibrates unexpectedly.
OSHA’s drill-press guidance warns that hand-held stock can catch and spin, and recommends using a hold-down fixture whenever possible. Workplace operators must also follow applicable guarding, training, inspection, and lockout requirements.
Sources and scope
This comparison is independent editorial guidance, not a hands-on test or endorsement of a particular machine. Features and safe-use details were checked against:
- Powermatic PM701 product documentation
- Woodworker’s Journal hollow-chisel mortiser overview
- OSHA drill-press hazard and safeguarding guidance
Product designs and approved accessories change. Verify the current manual for the exact machine, chisel, bushing, and attachment before purchasing or operating them.
What to do next
Cut the four-mortise sample, record the full setup and cleanup time, and inspect the results under good light. If the fourth mortise is accurate and the process fits your pace, keep using the drill press. If workholding, feed effort, or repeated setup remains the bottleneck across real projects, shortlist a dedicated mortiser by fence control, hold-down security, stroke, capacity, depth-stop design, and local service support.
Then use the marking and measuring tools guide to standardize reference faces and layout across the complete set of parts.

The Carpenter's Guide Editorial Team
Independent trade-focused editorial team